Completed project: fixing a leaking shower from a bad installation in Newmarket
This shower in Newmarket was not old. The tile was current, the glass was modern, and from the doorway it looked like a finished renovation. But the grout along the curb had cracked open, the base tiles were separating from the wall, and black mould was creeping out of every joint at the floor. The homeowners called us because water had started showing up where it should never be. What we found underneath is the reason this post exists: the original installer had skipped the parts of a shower you cannot see — and those are the only parts that keep water in.
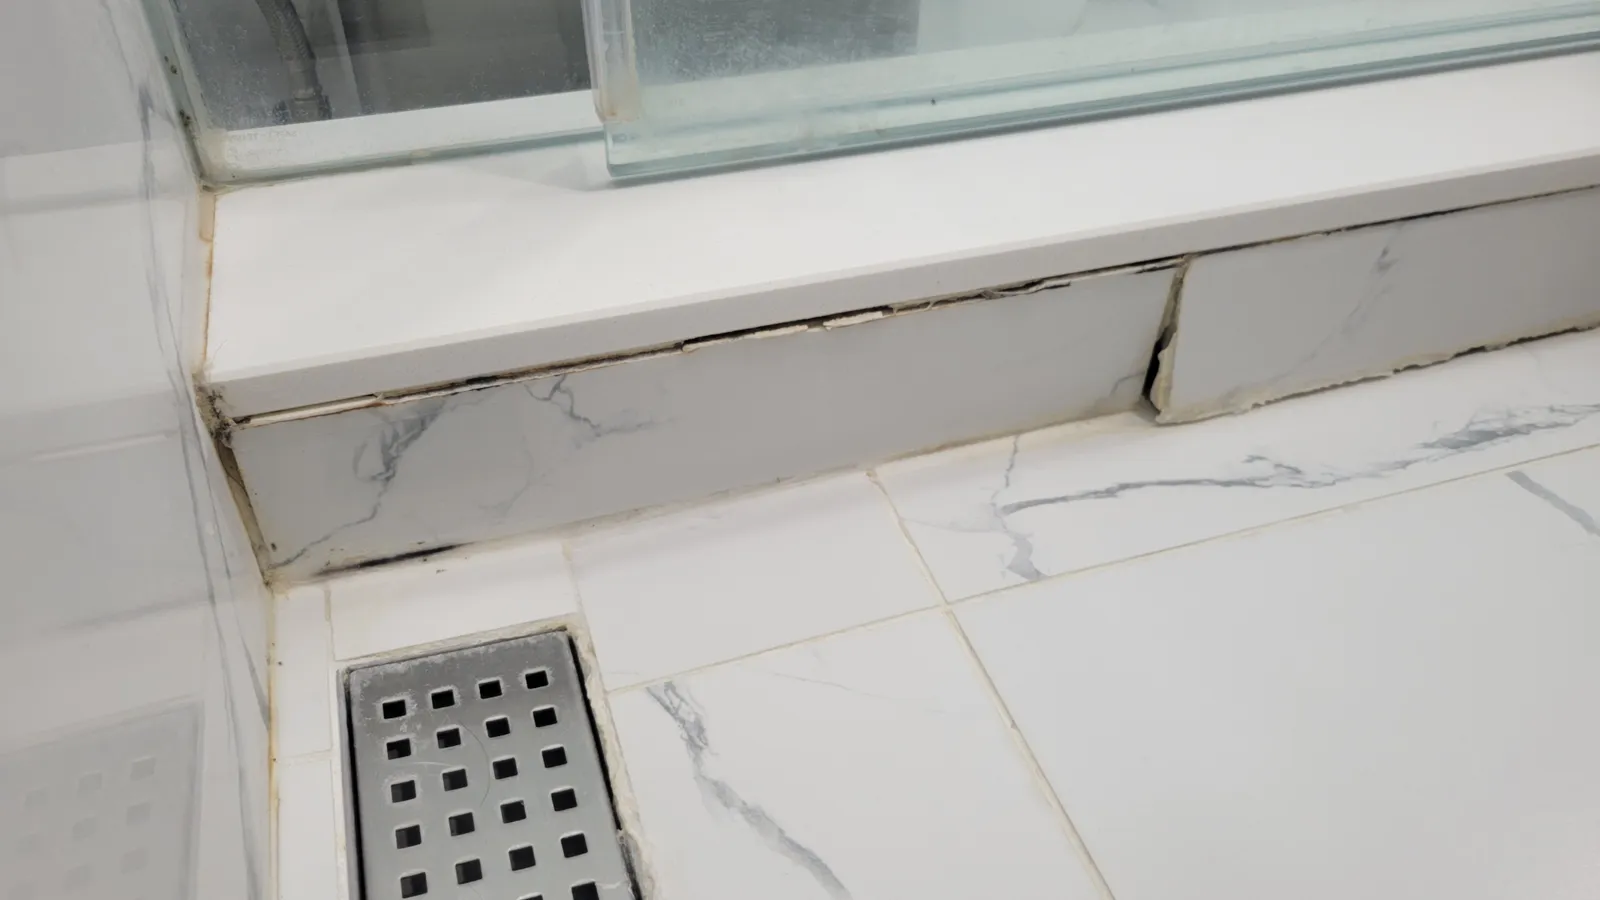
What we found during demolition
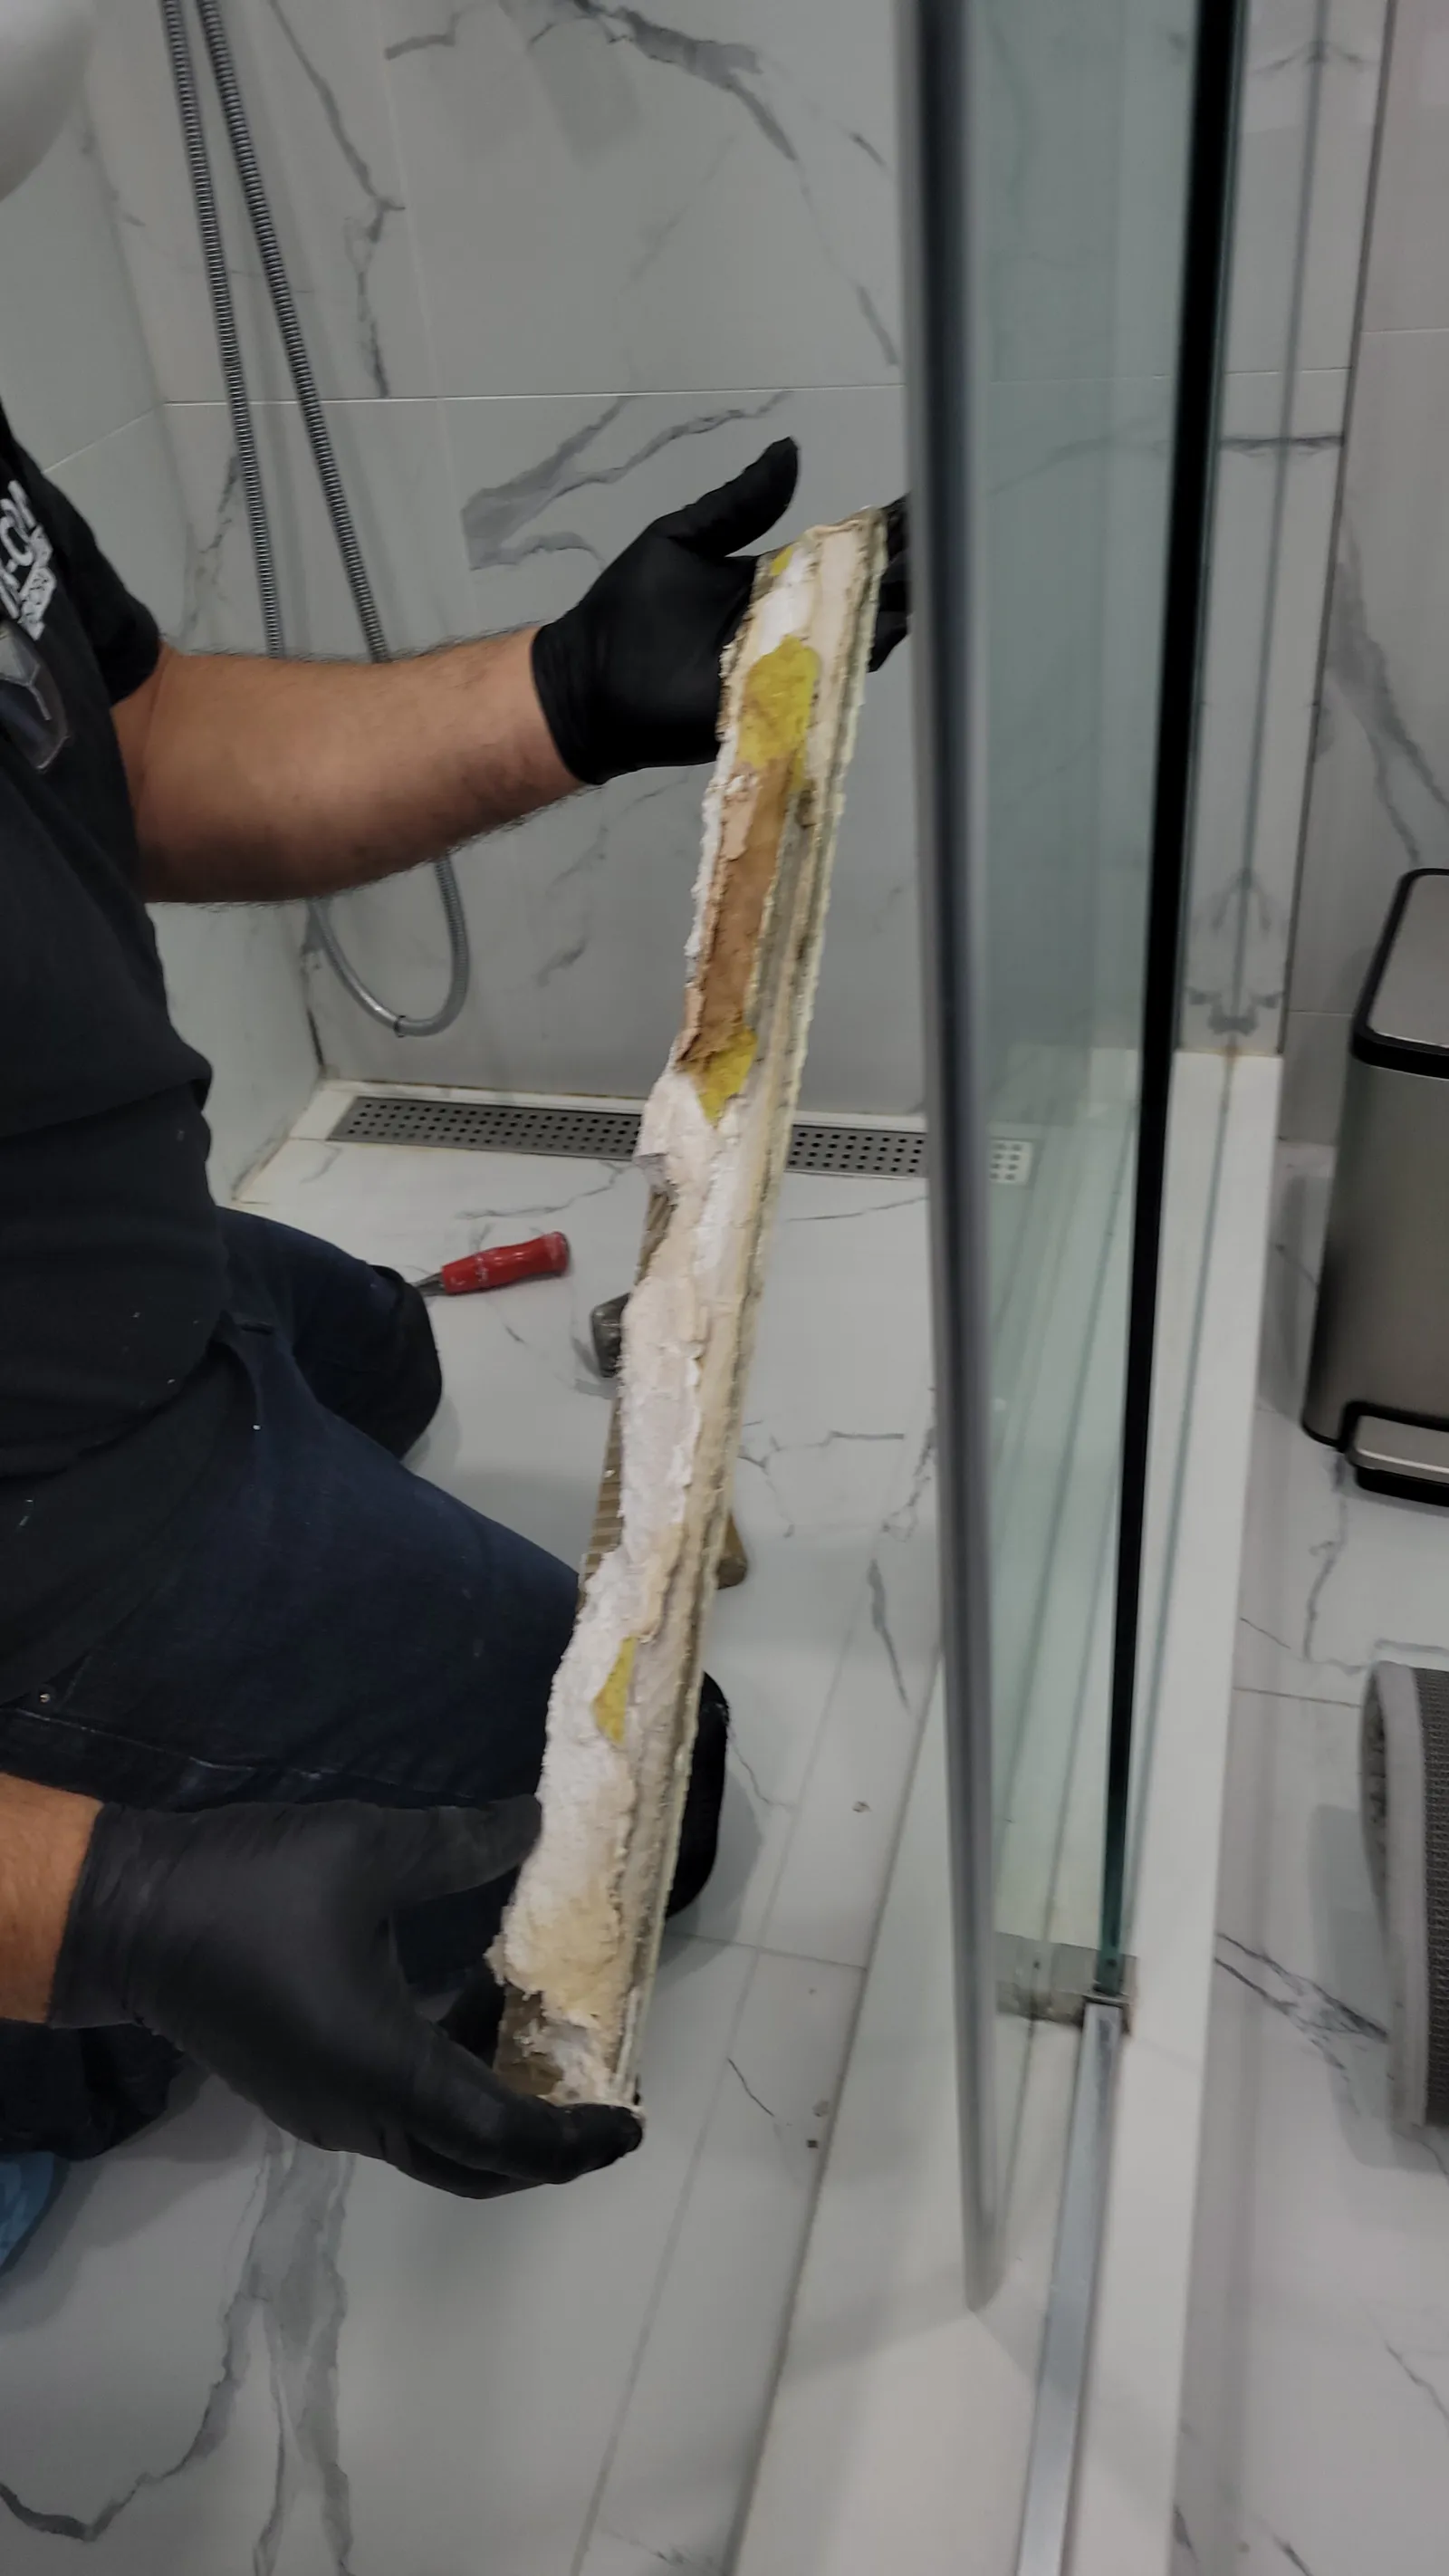
The moment we lifted the curb tile, the story was obvious. The mortar inside was saturated and stained, and the material crumbled apart wet in our hands. The shower floor had been built without a properly formed and sloped pan, the old liner was doing nothing useful, and water had been soaking into the curb and under the floor since the day the shower was first used.
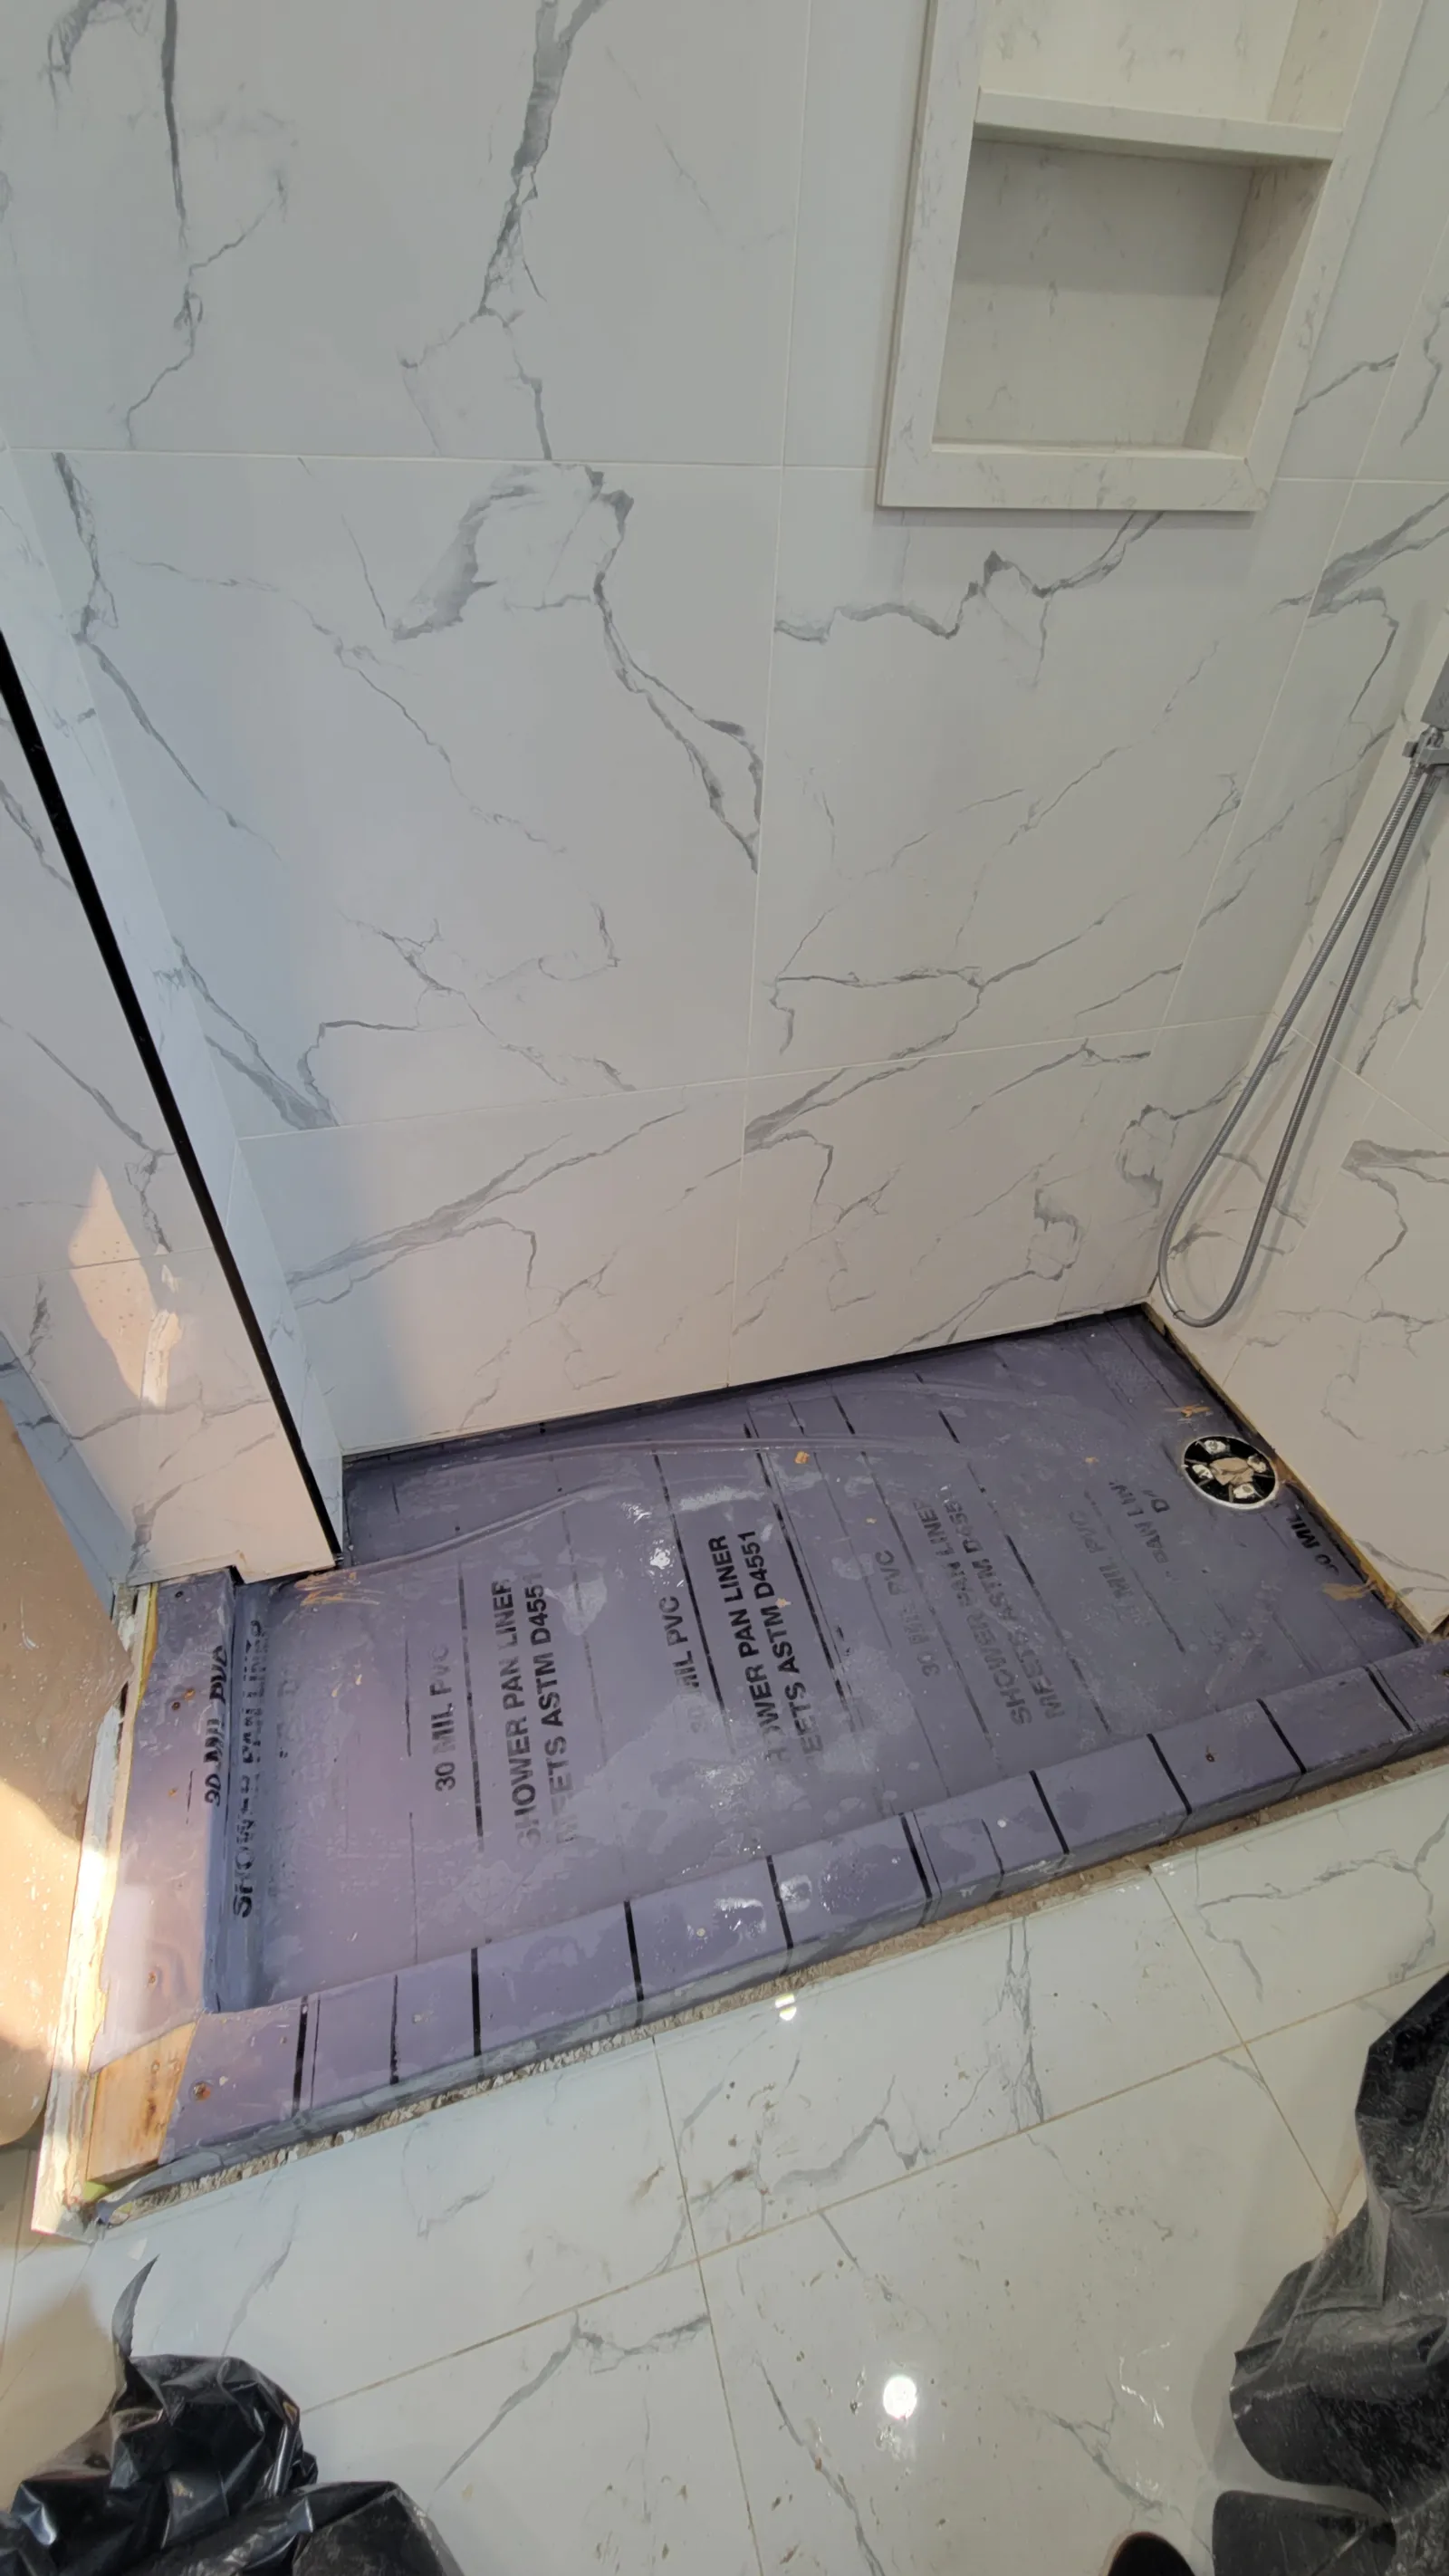
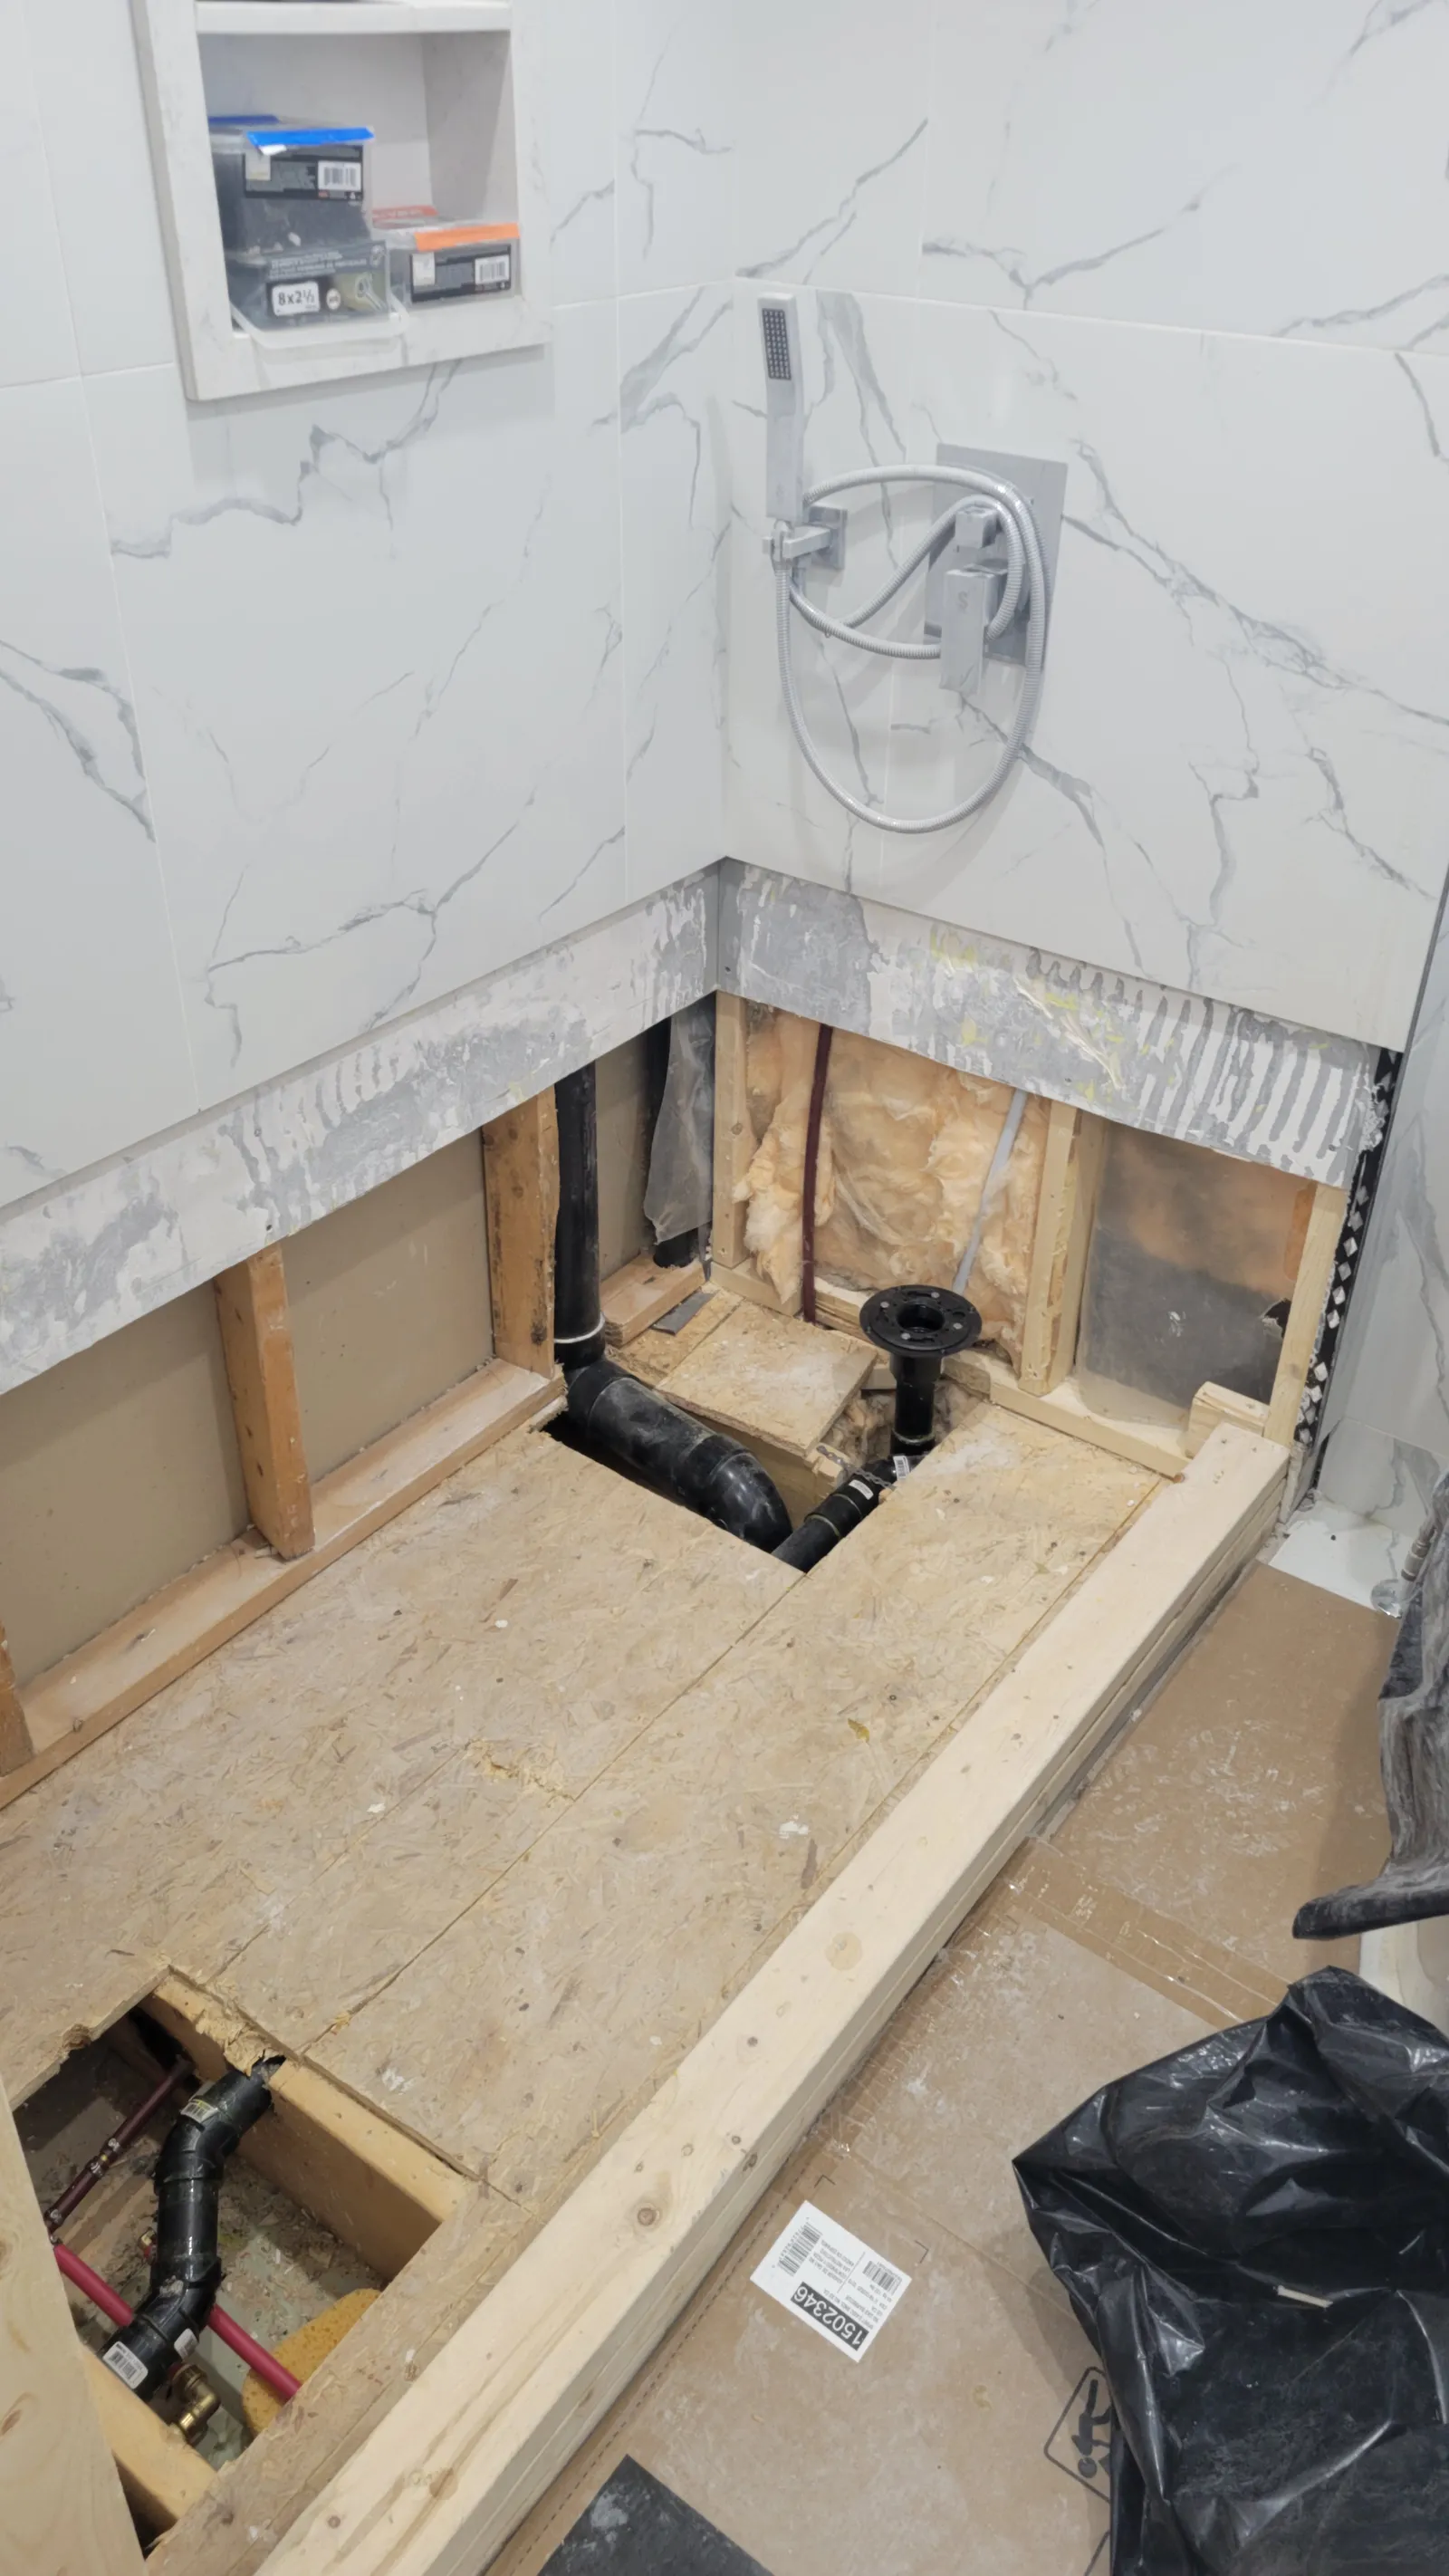
With the floor out, we opened the subfloor to check how far the water had travelled. That meant exposing the joists and the drain plumbing below the shower — the only honest way to know the structure is dry and sound before rebuilding on top of it. We repaired the framing, replaced what the water had ruined, and re-ran the drain for the new layout.
Rebuilding it the right way
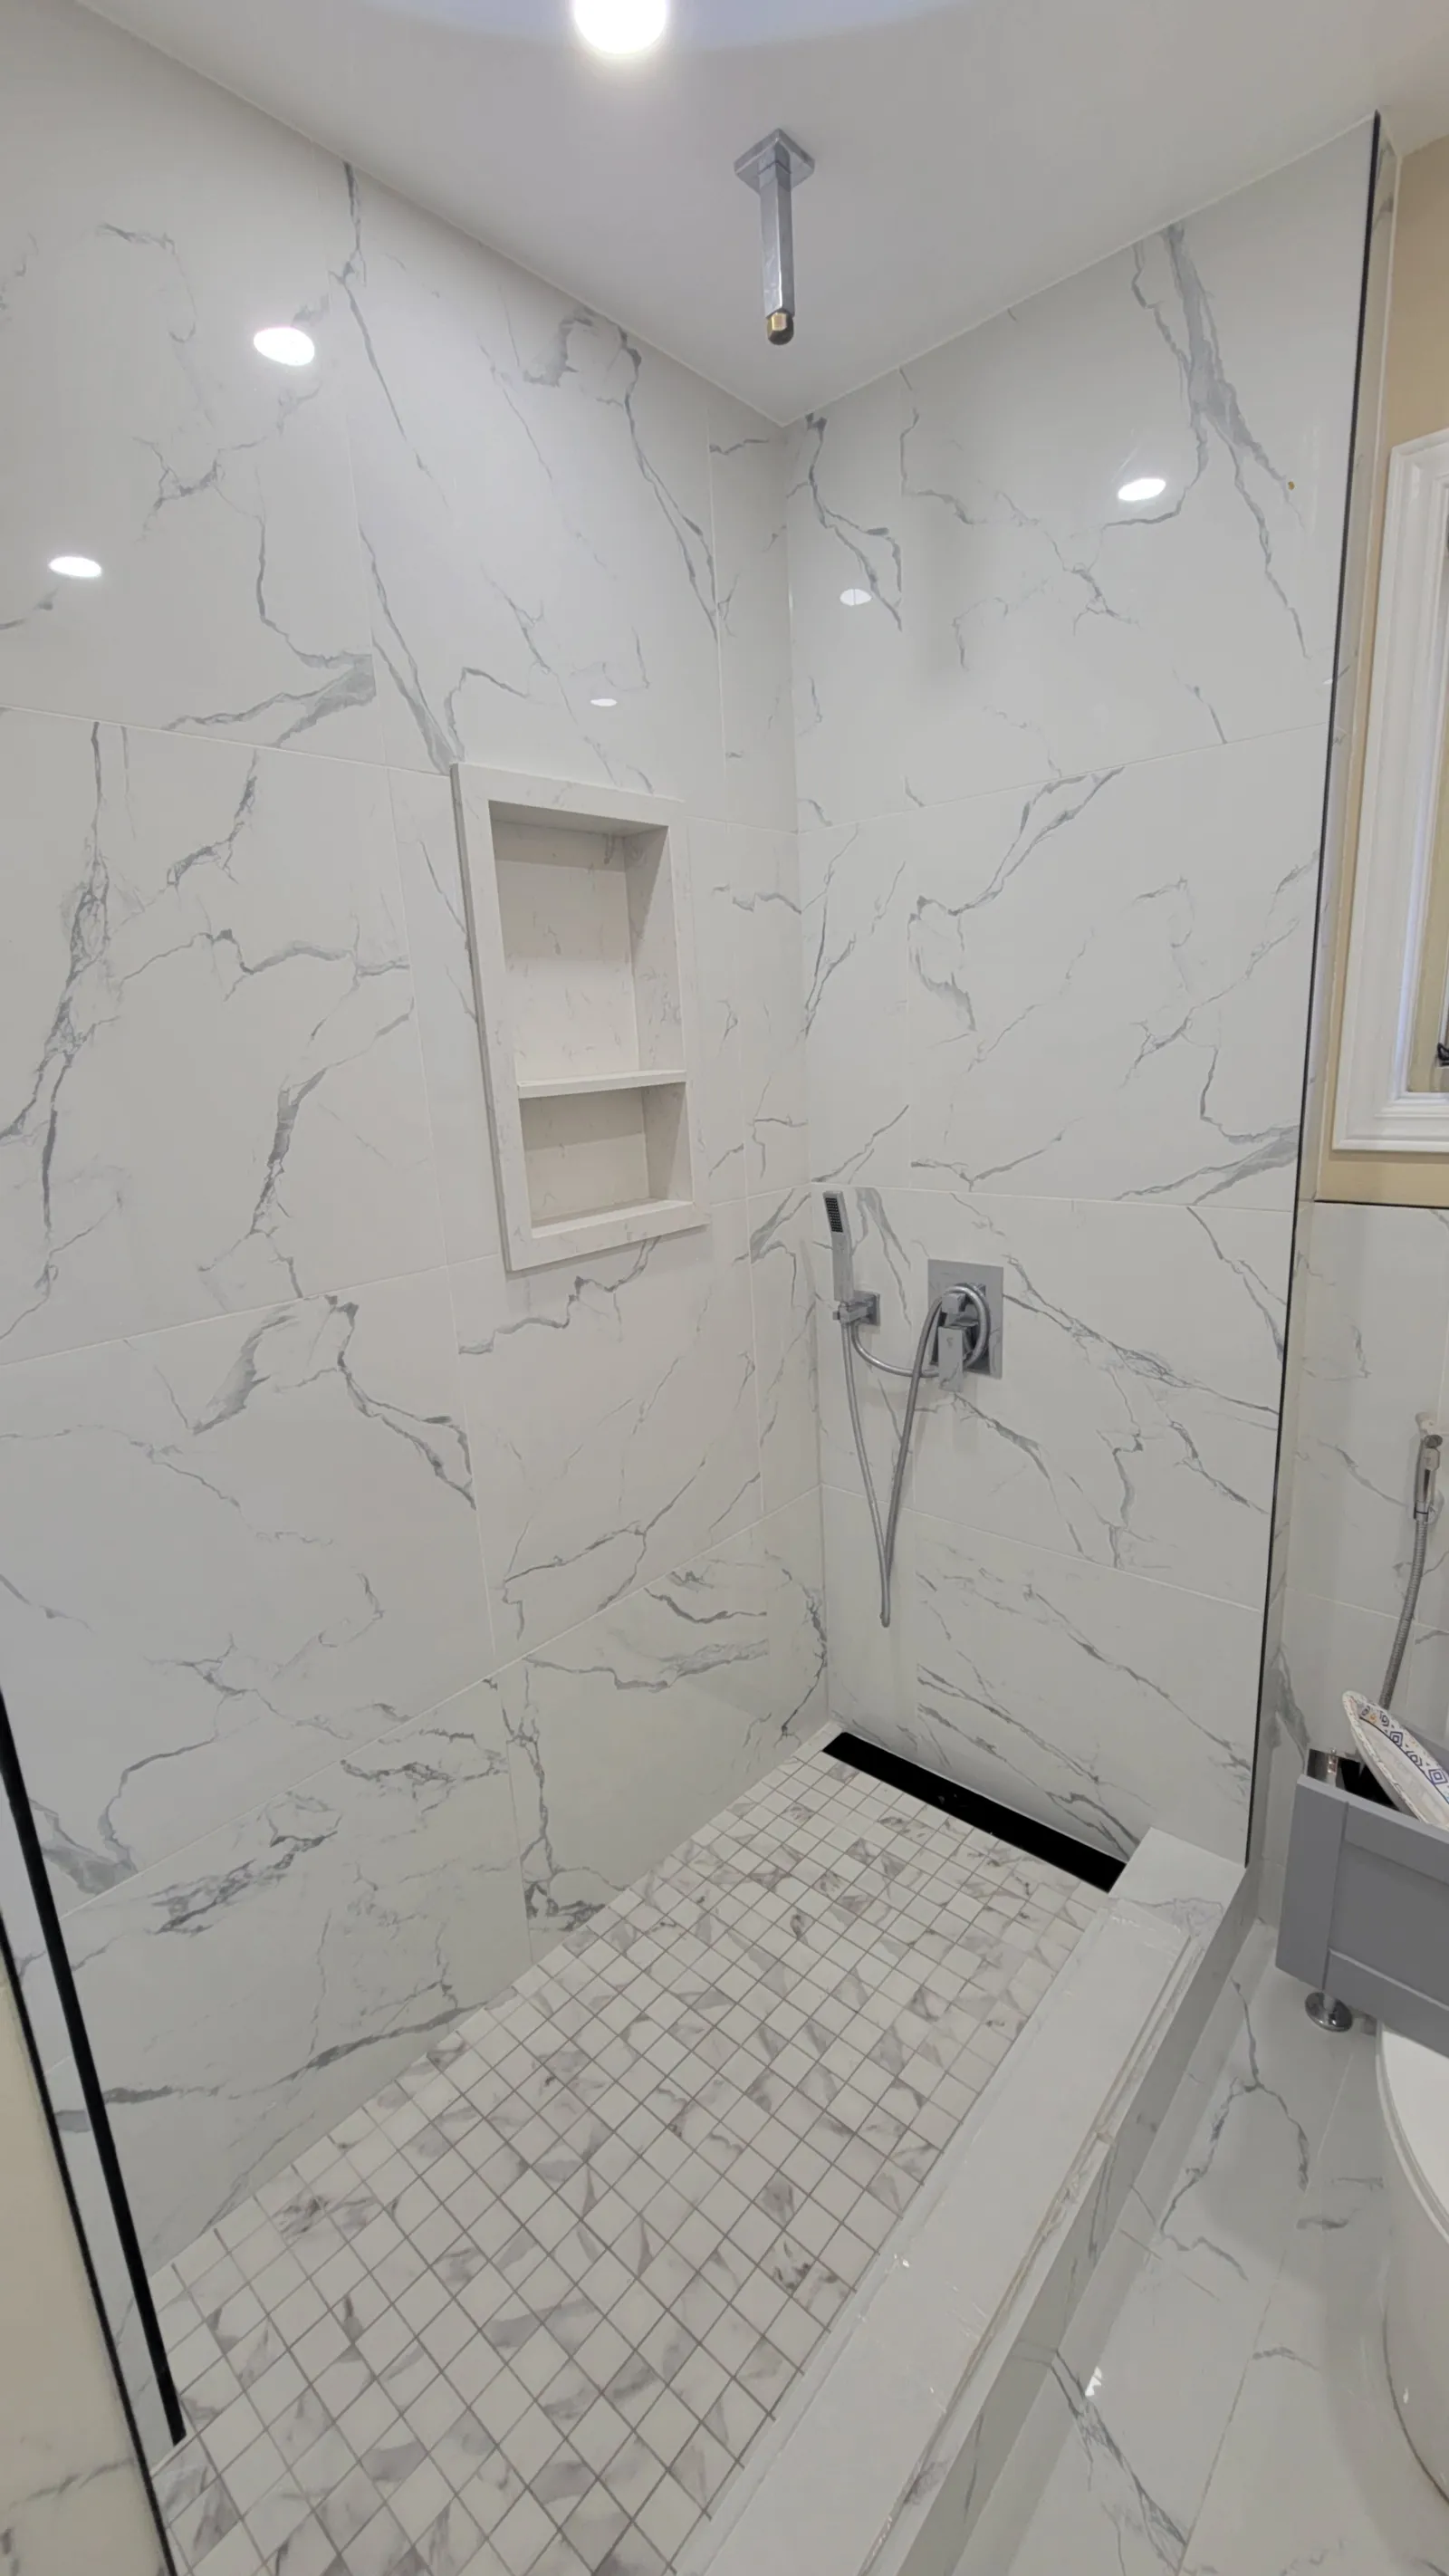
A shower floor is a system, and every layer matters. We formed a new mortar bed with a proper, consistent slope to a new linear drain, sheathed the walls and curb in cement board, and sealed the transitions with waterproofing membrane and banding. This is the stage the first installer skipped — and it is invisible once the tile goes on, which is exactly why it gets skipped by people who plan not to be around when it fails.
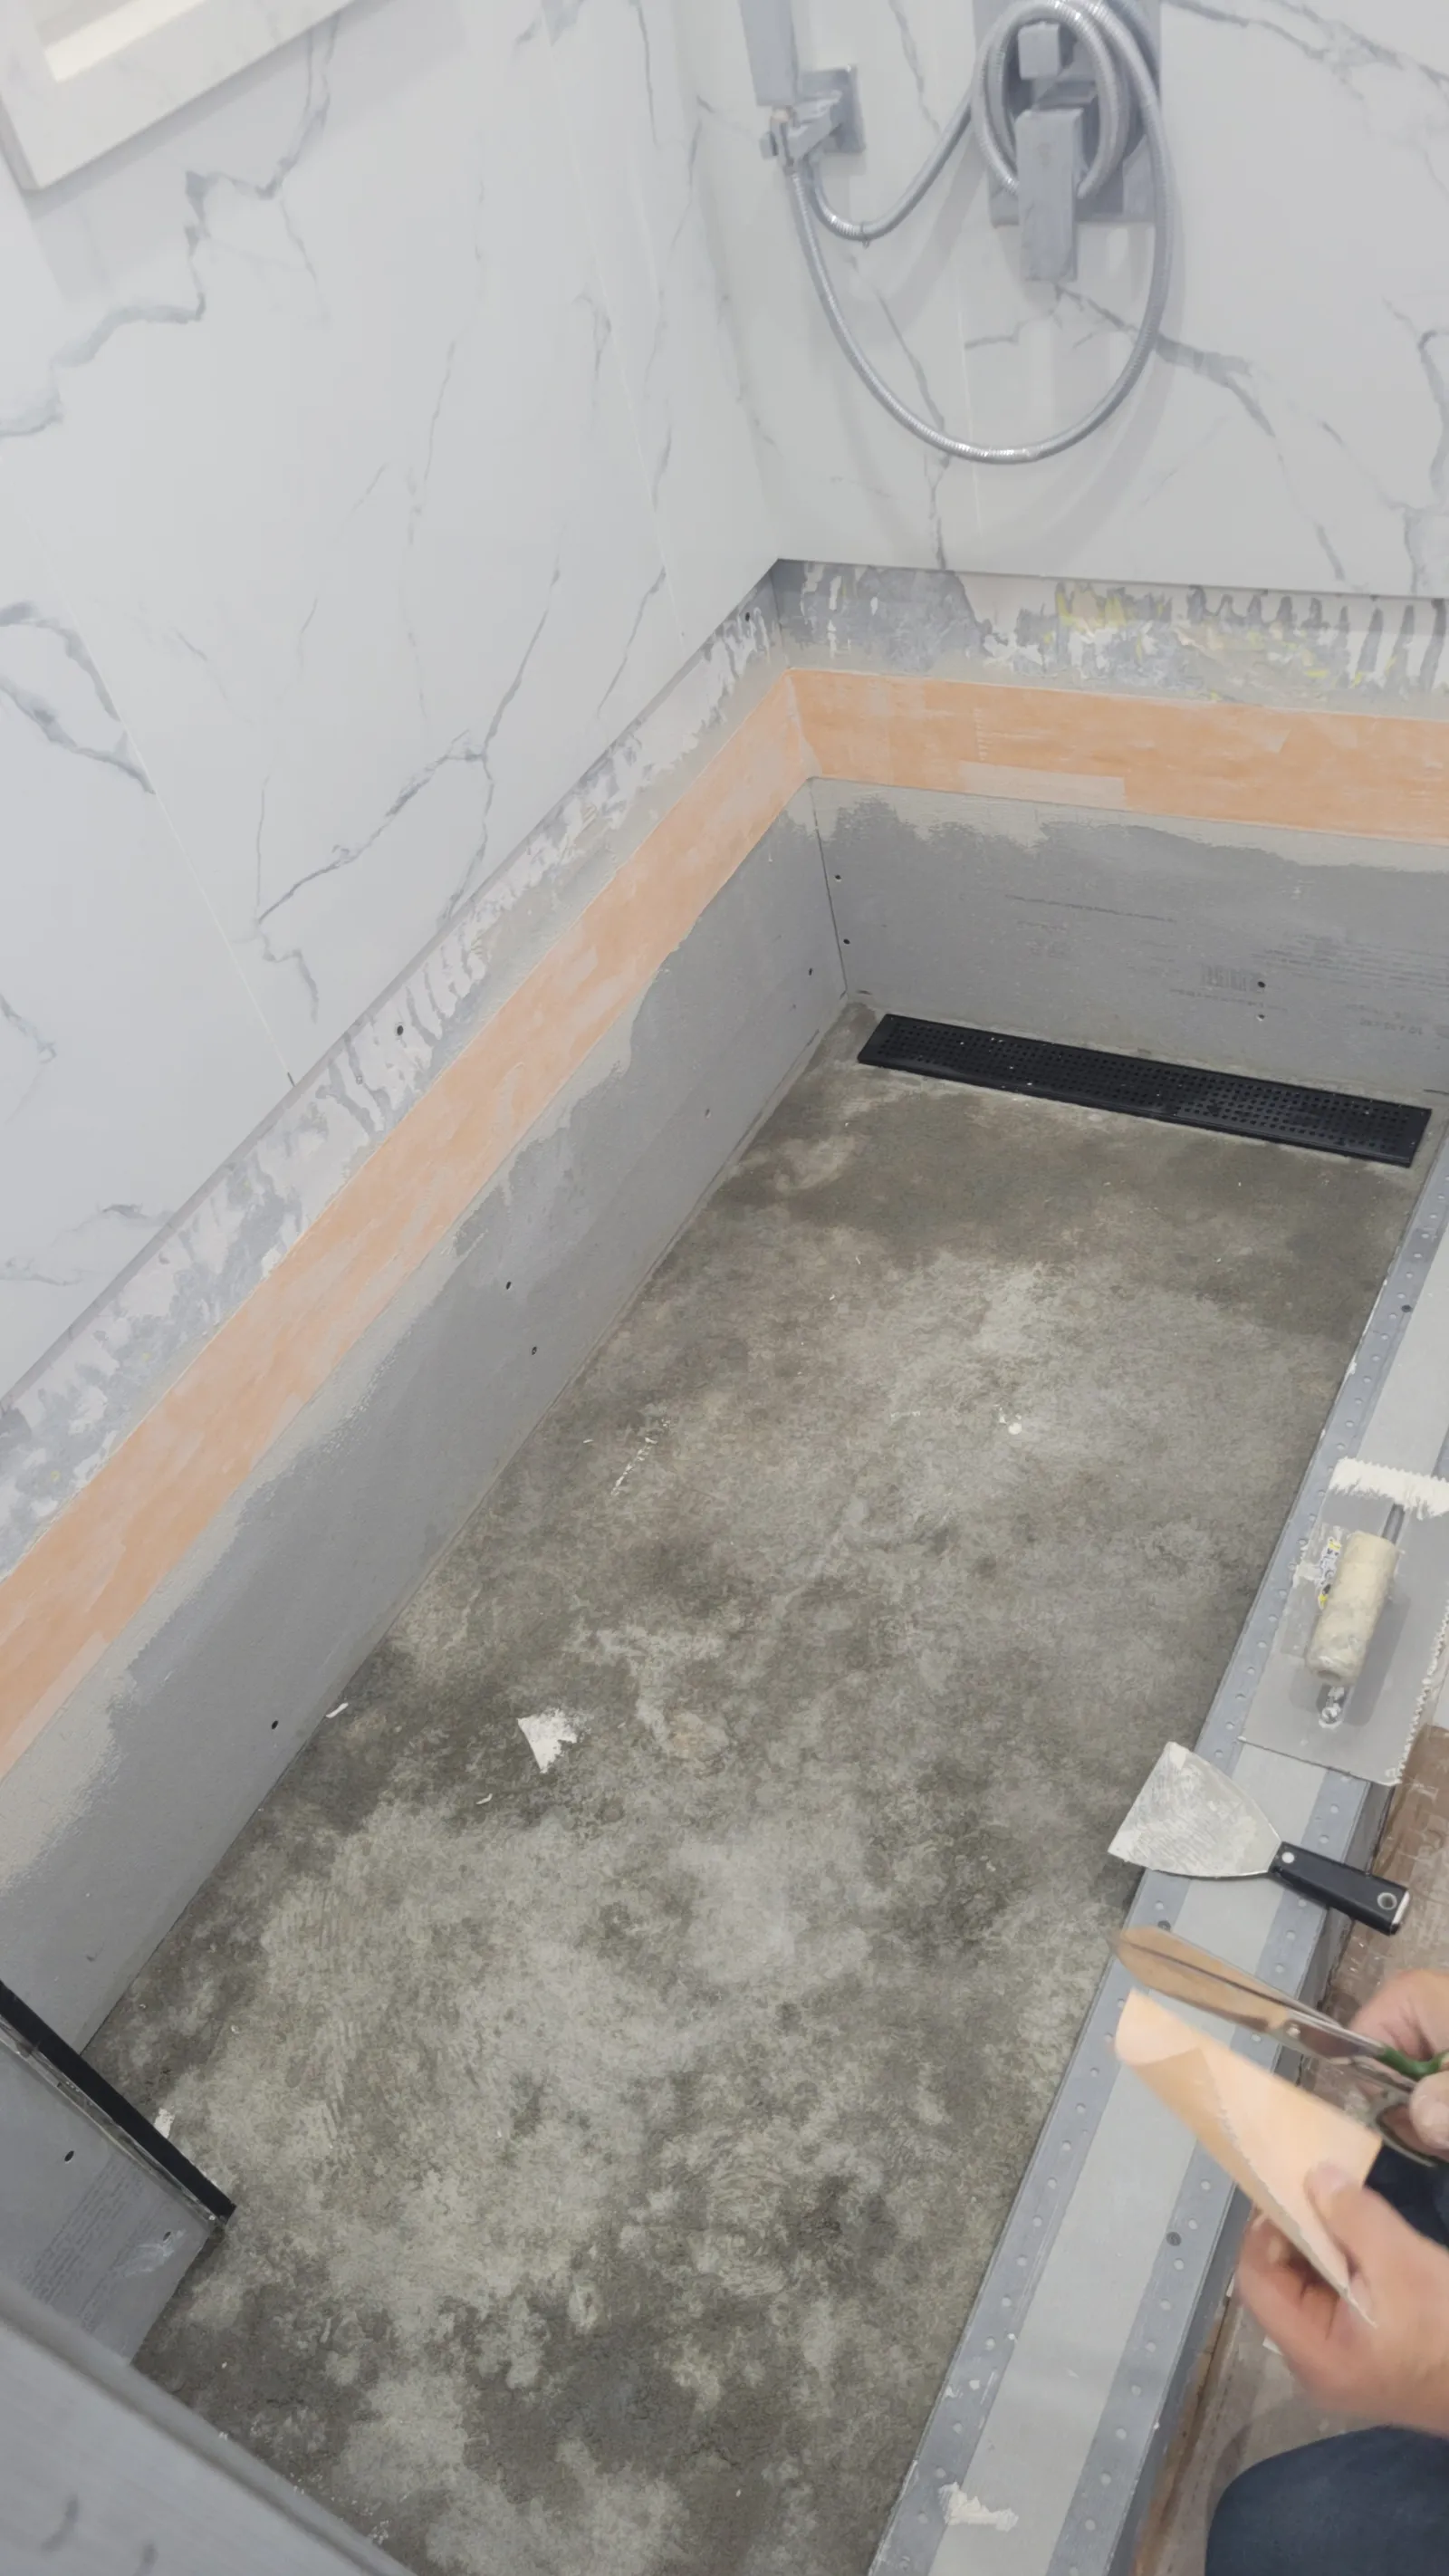
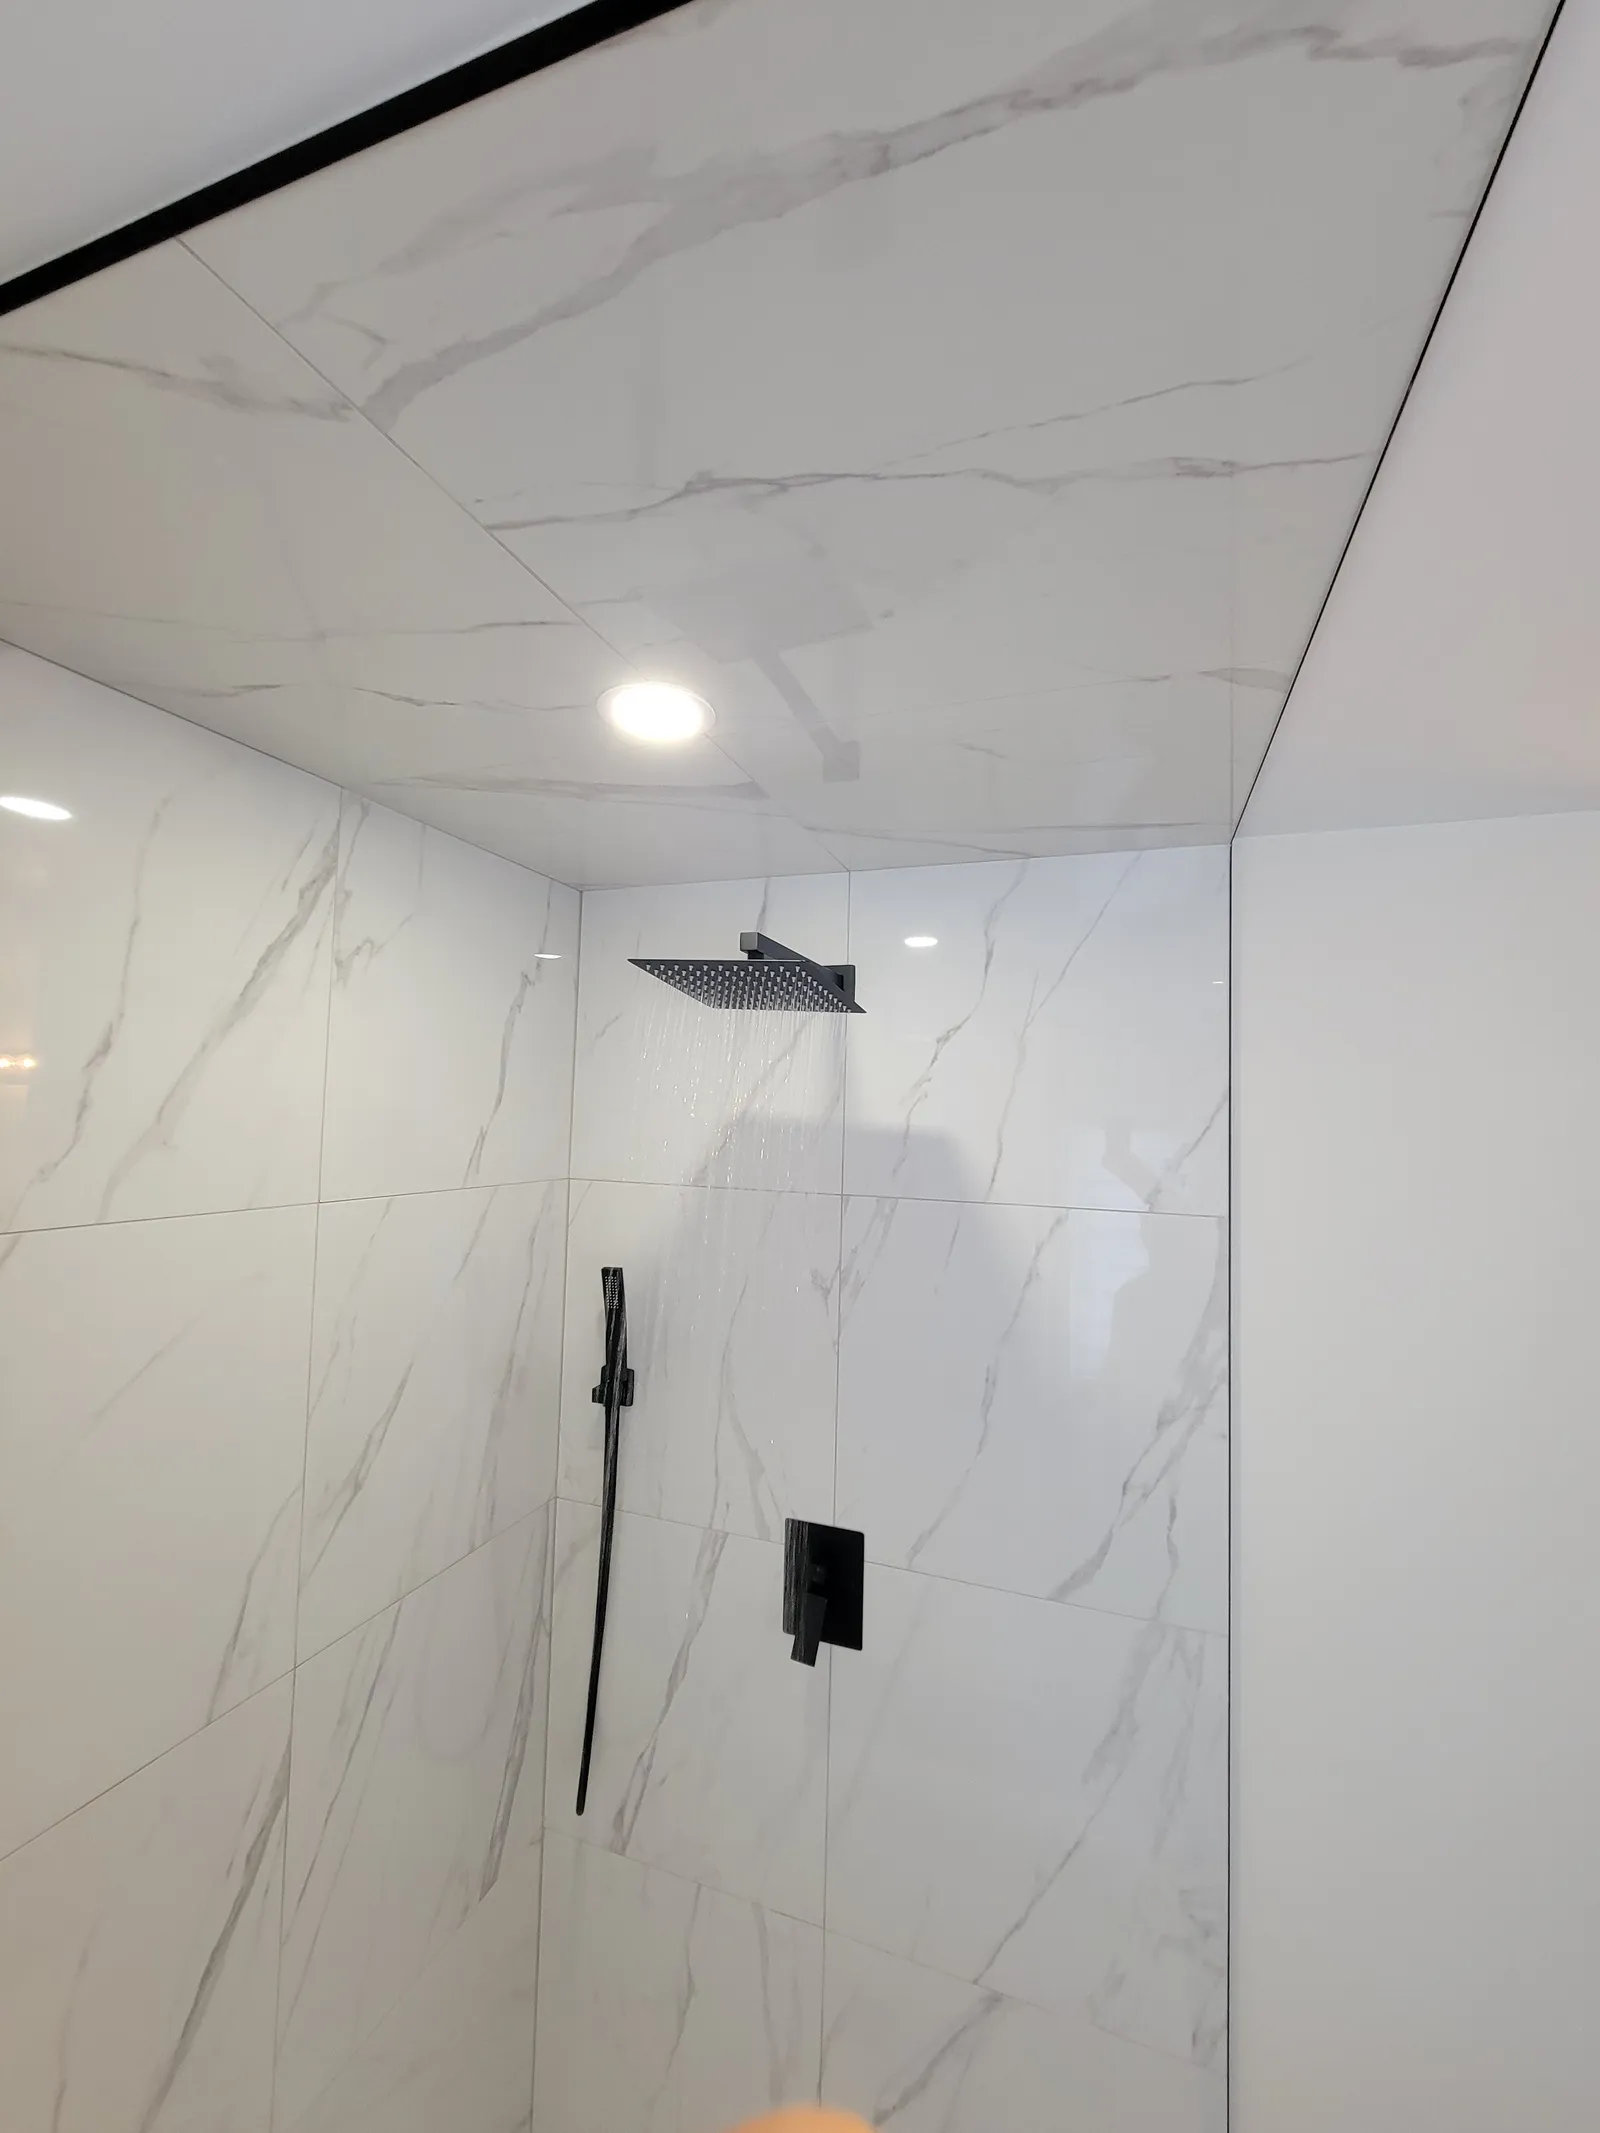
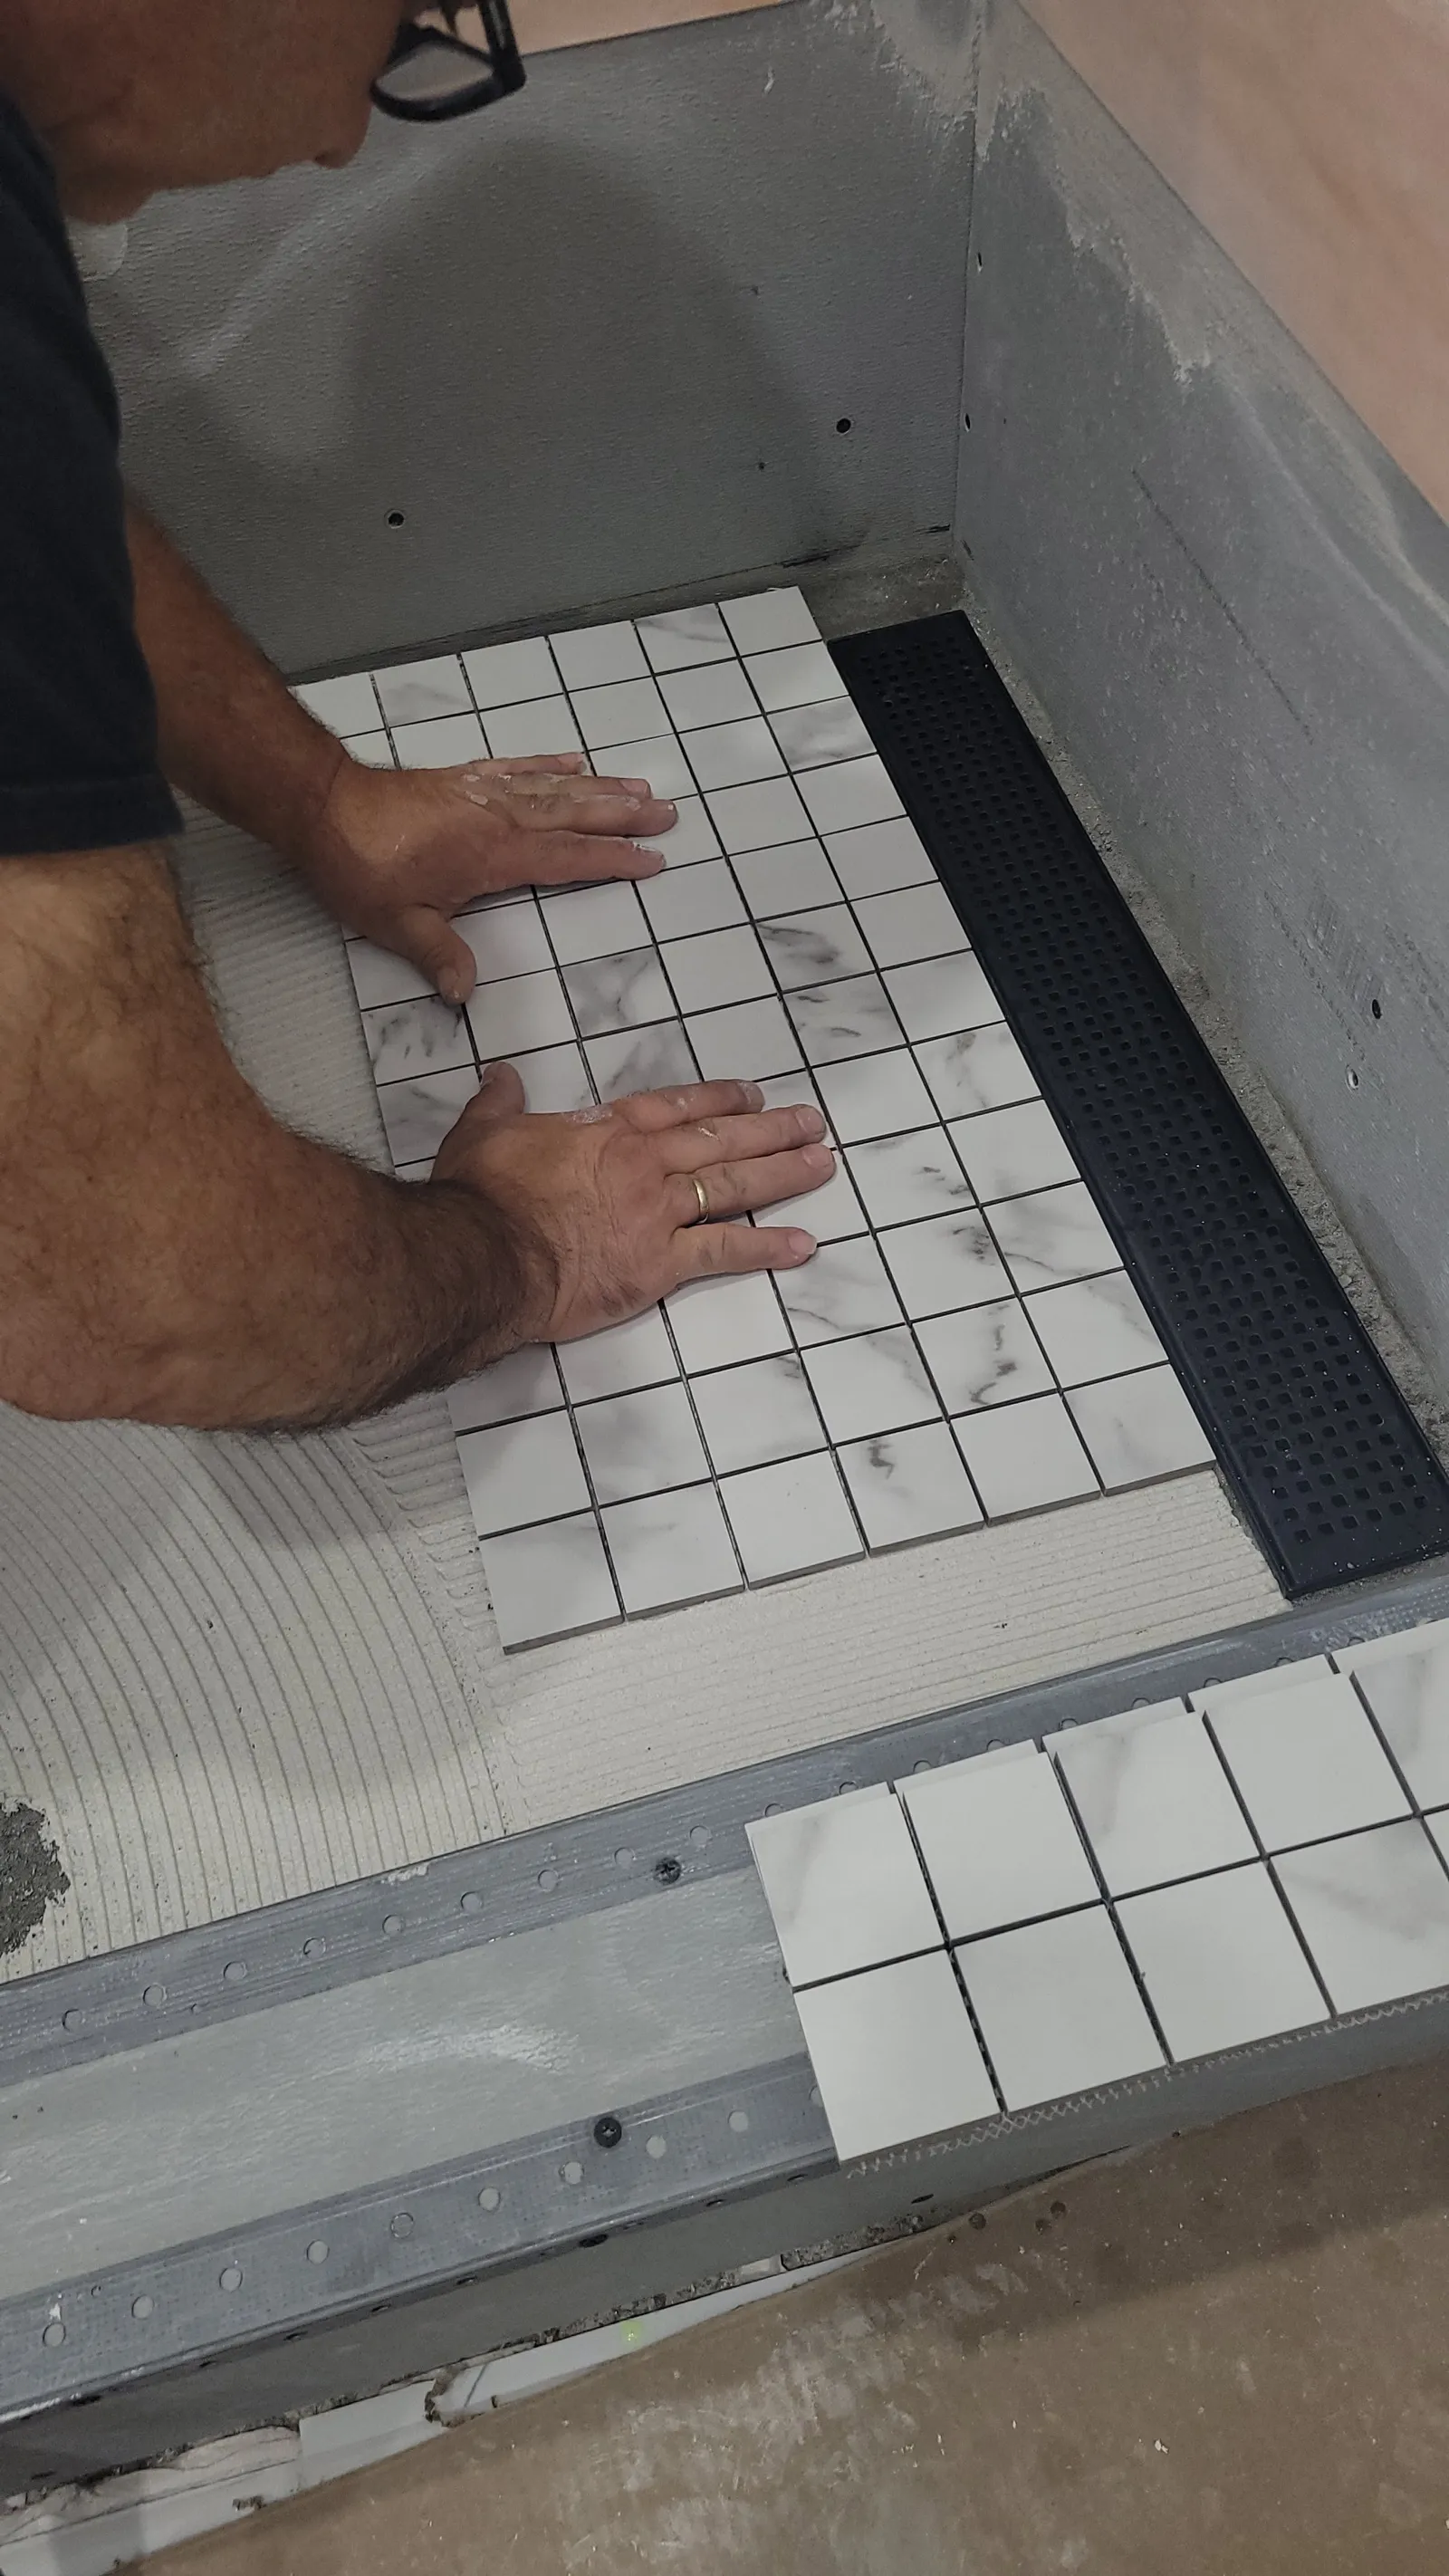
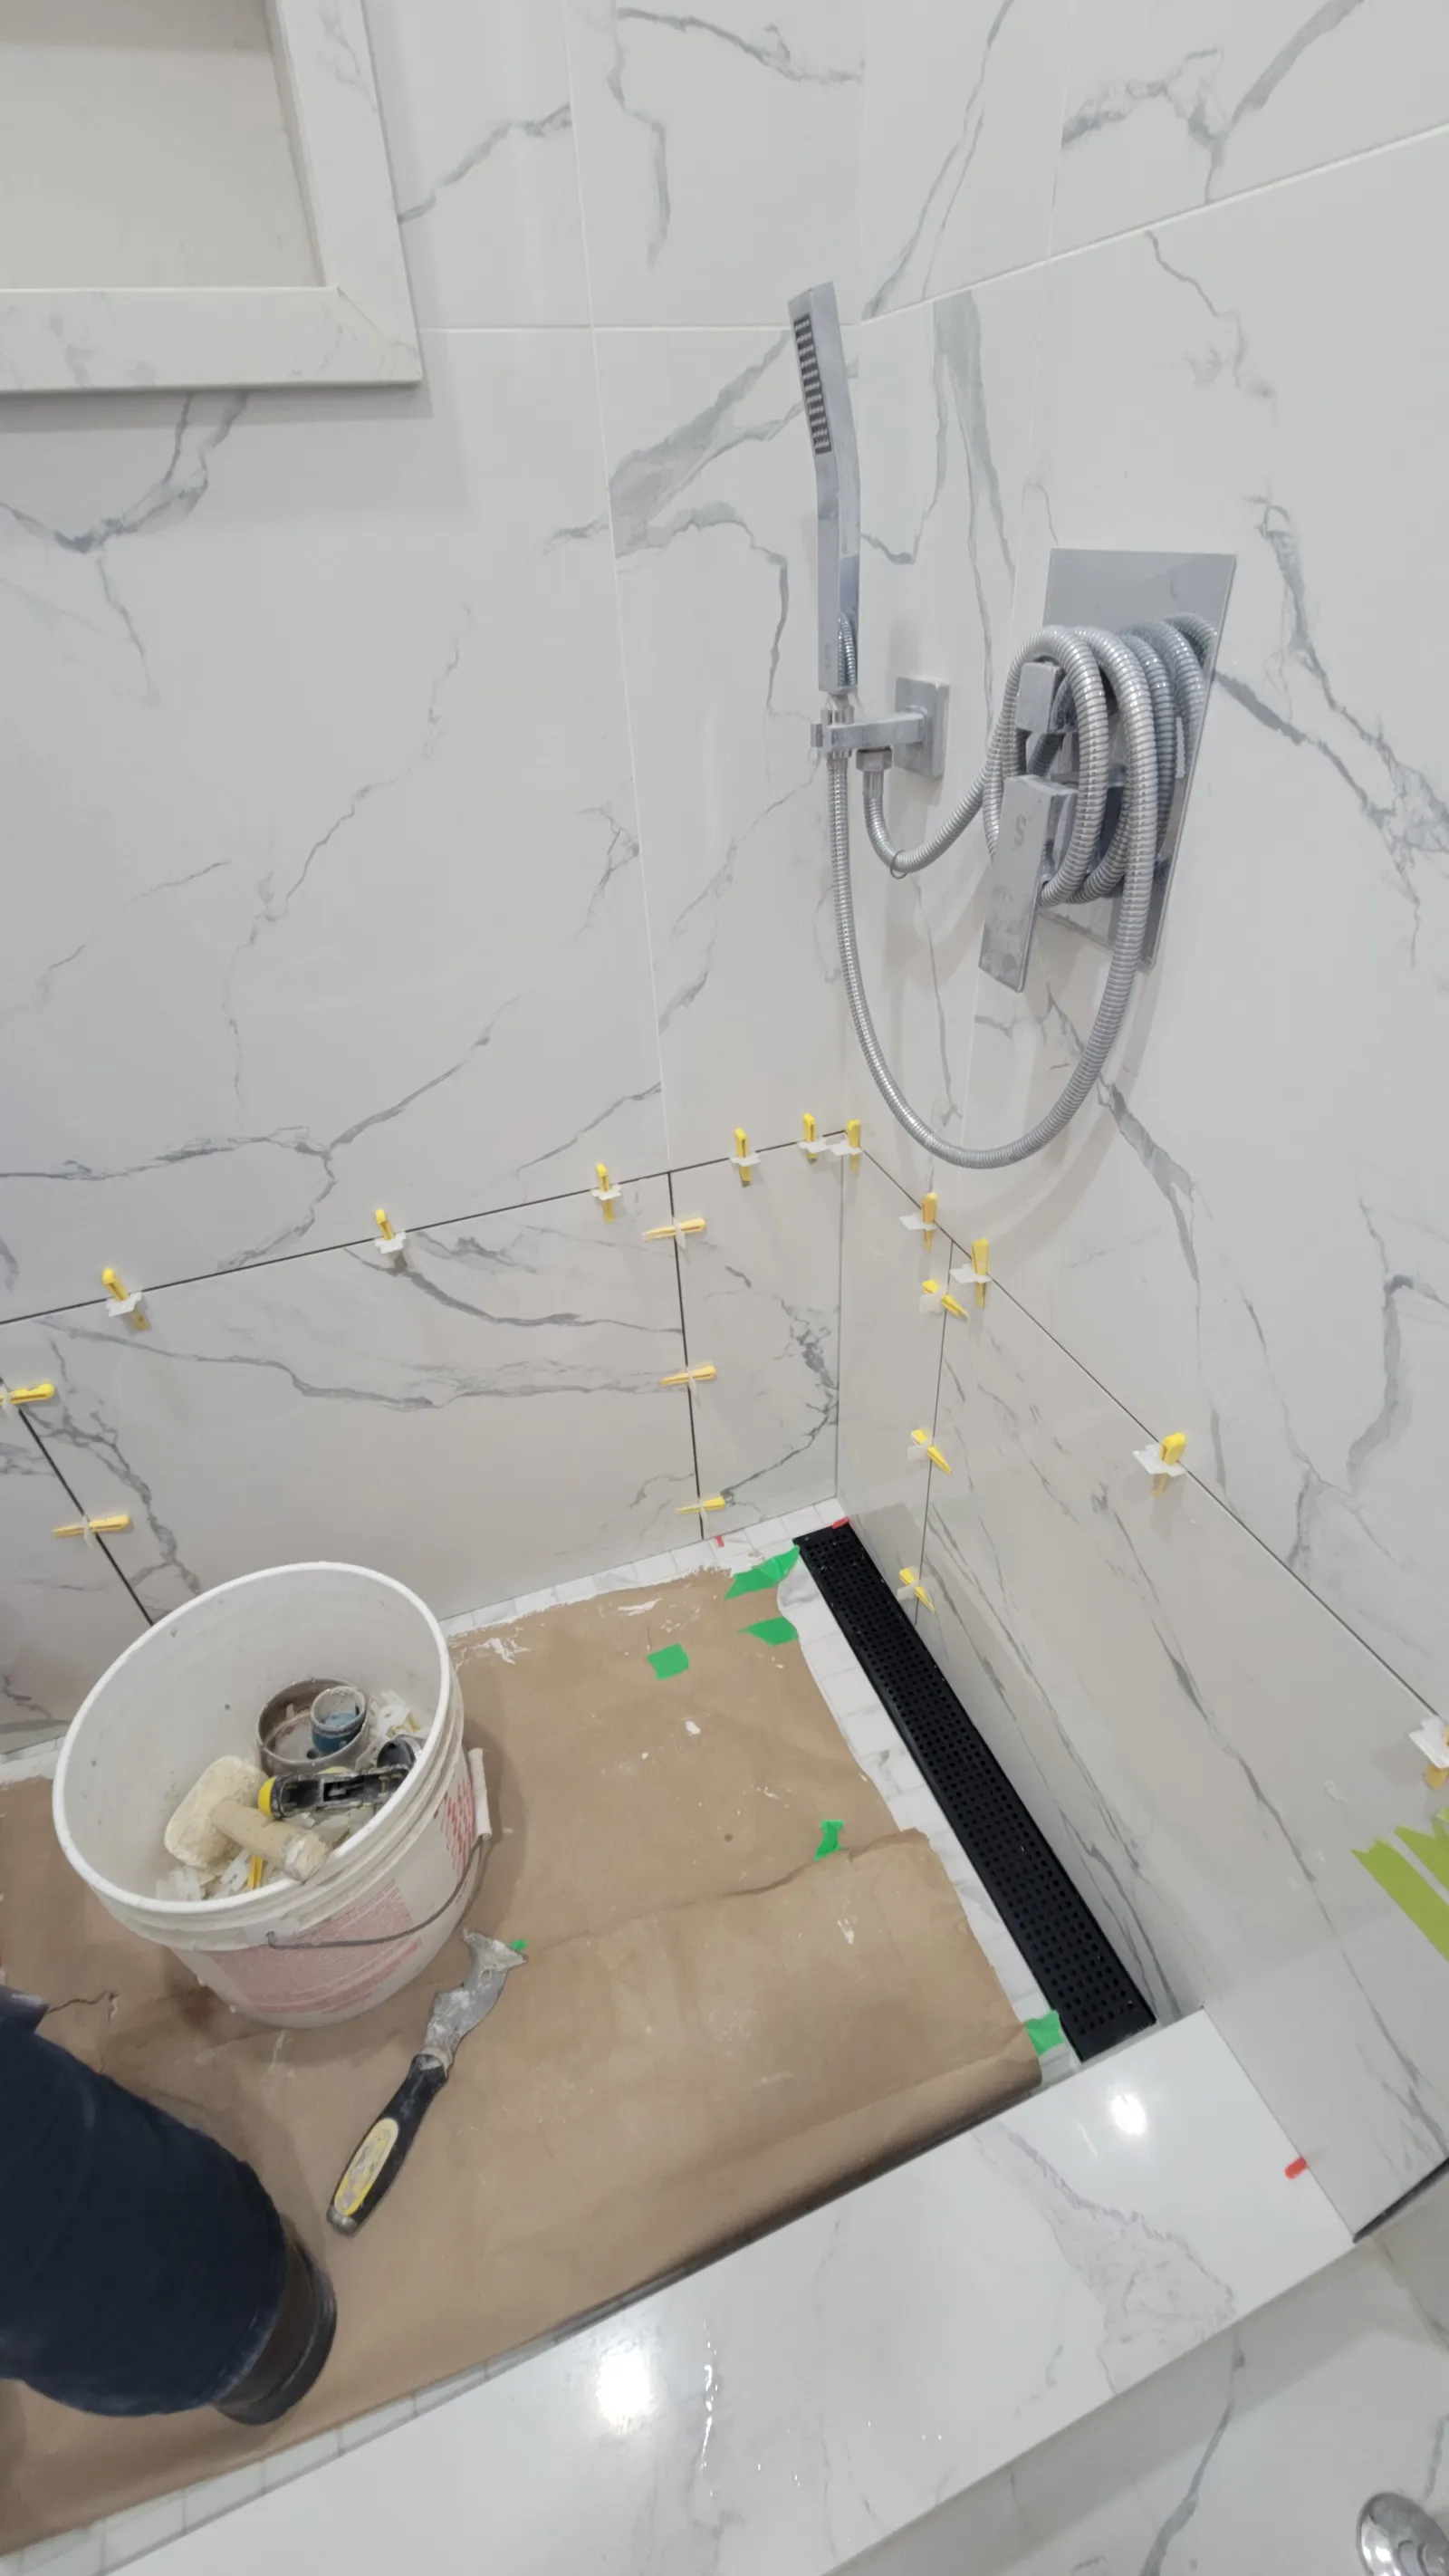
On top of the waterproofed pan went a marble-look porcelain mosaic — small tiles take the slope smoothly and give the floor grip — set tight to the new matte-black linear drain. The rebuilt curb and lower walls were then re-tiled in large-format porcelain, set with levelling clips so every edge sits dead flush, and the shower valve and hand shower went back on their finished wall.
The finish
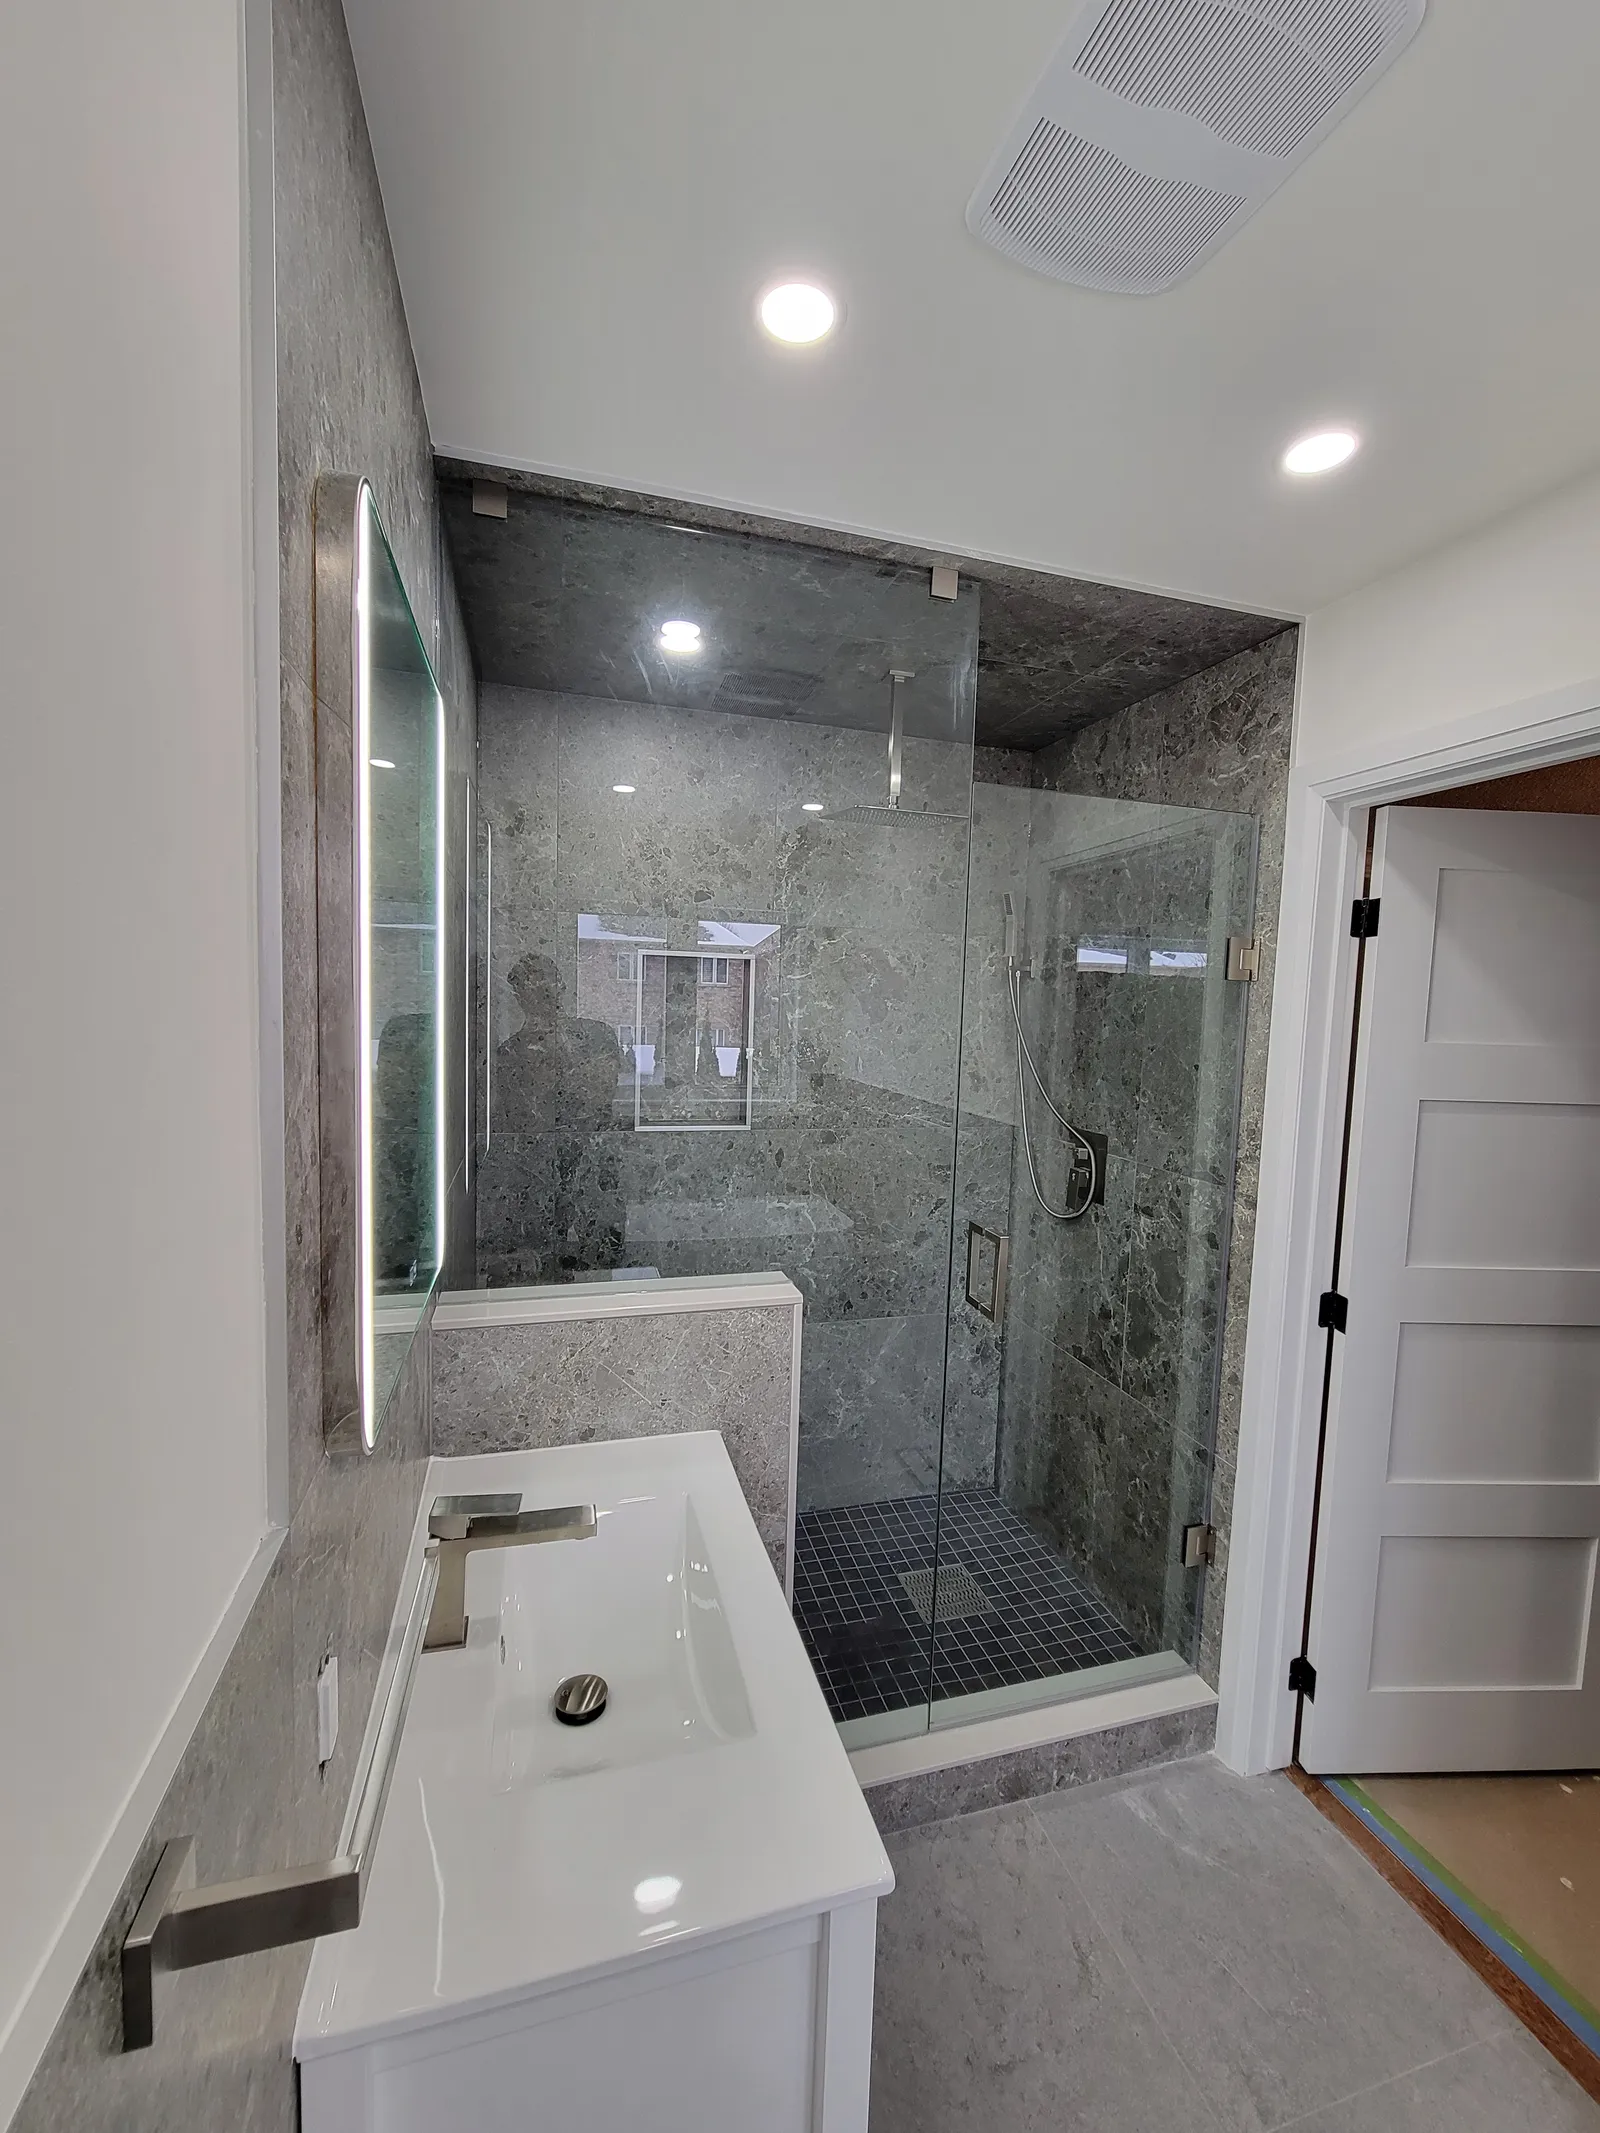
The details are what make a rebuild read as a finished bathroom rather than a repair. The recessed niche was squared up and edged in slim black trim to match the linear drain, ready for its quartz shelf and back panel. With the tile grouted and sealed, we finished the shower with a square rain head and a wall-mounted hand shower. Last came a new frameless glass panel, measured and set with a laser level after tiling — because glass is unforgiving and no real wall is perfectly plumb.
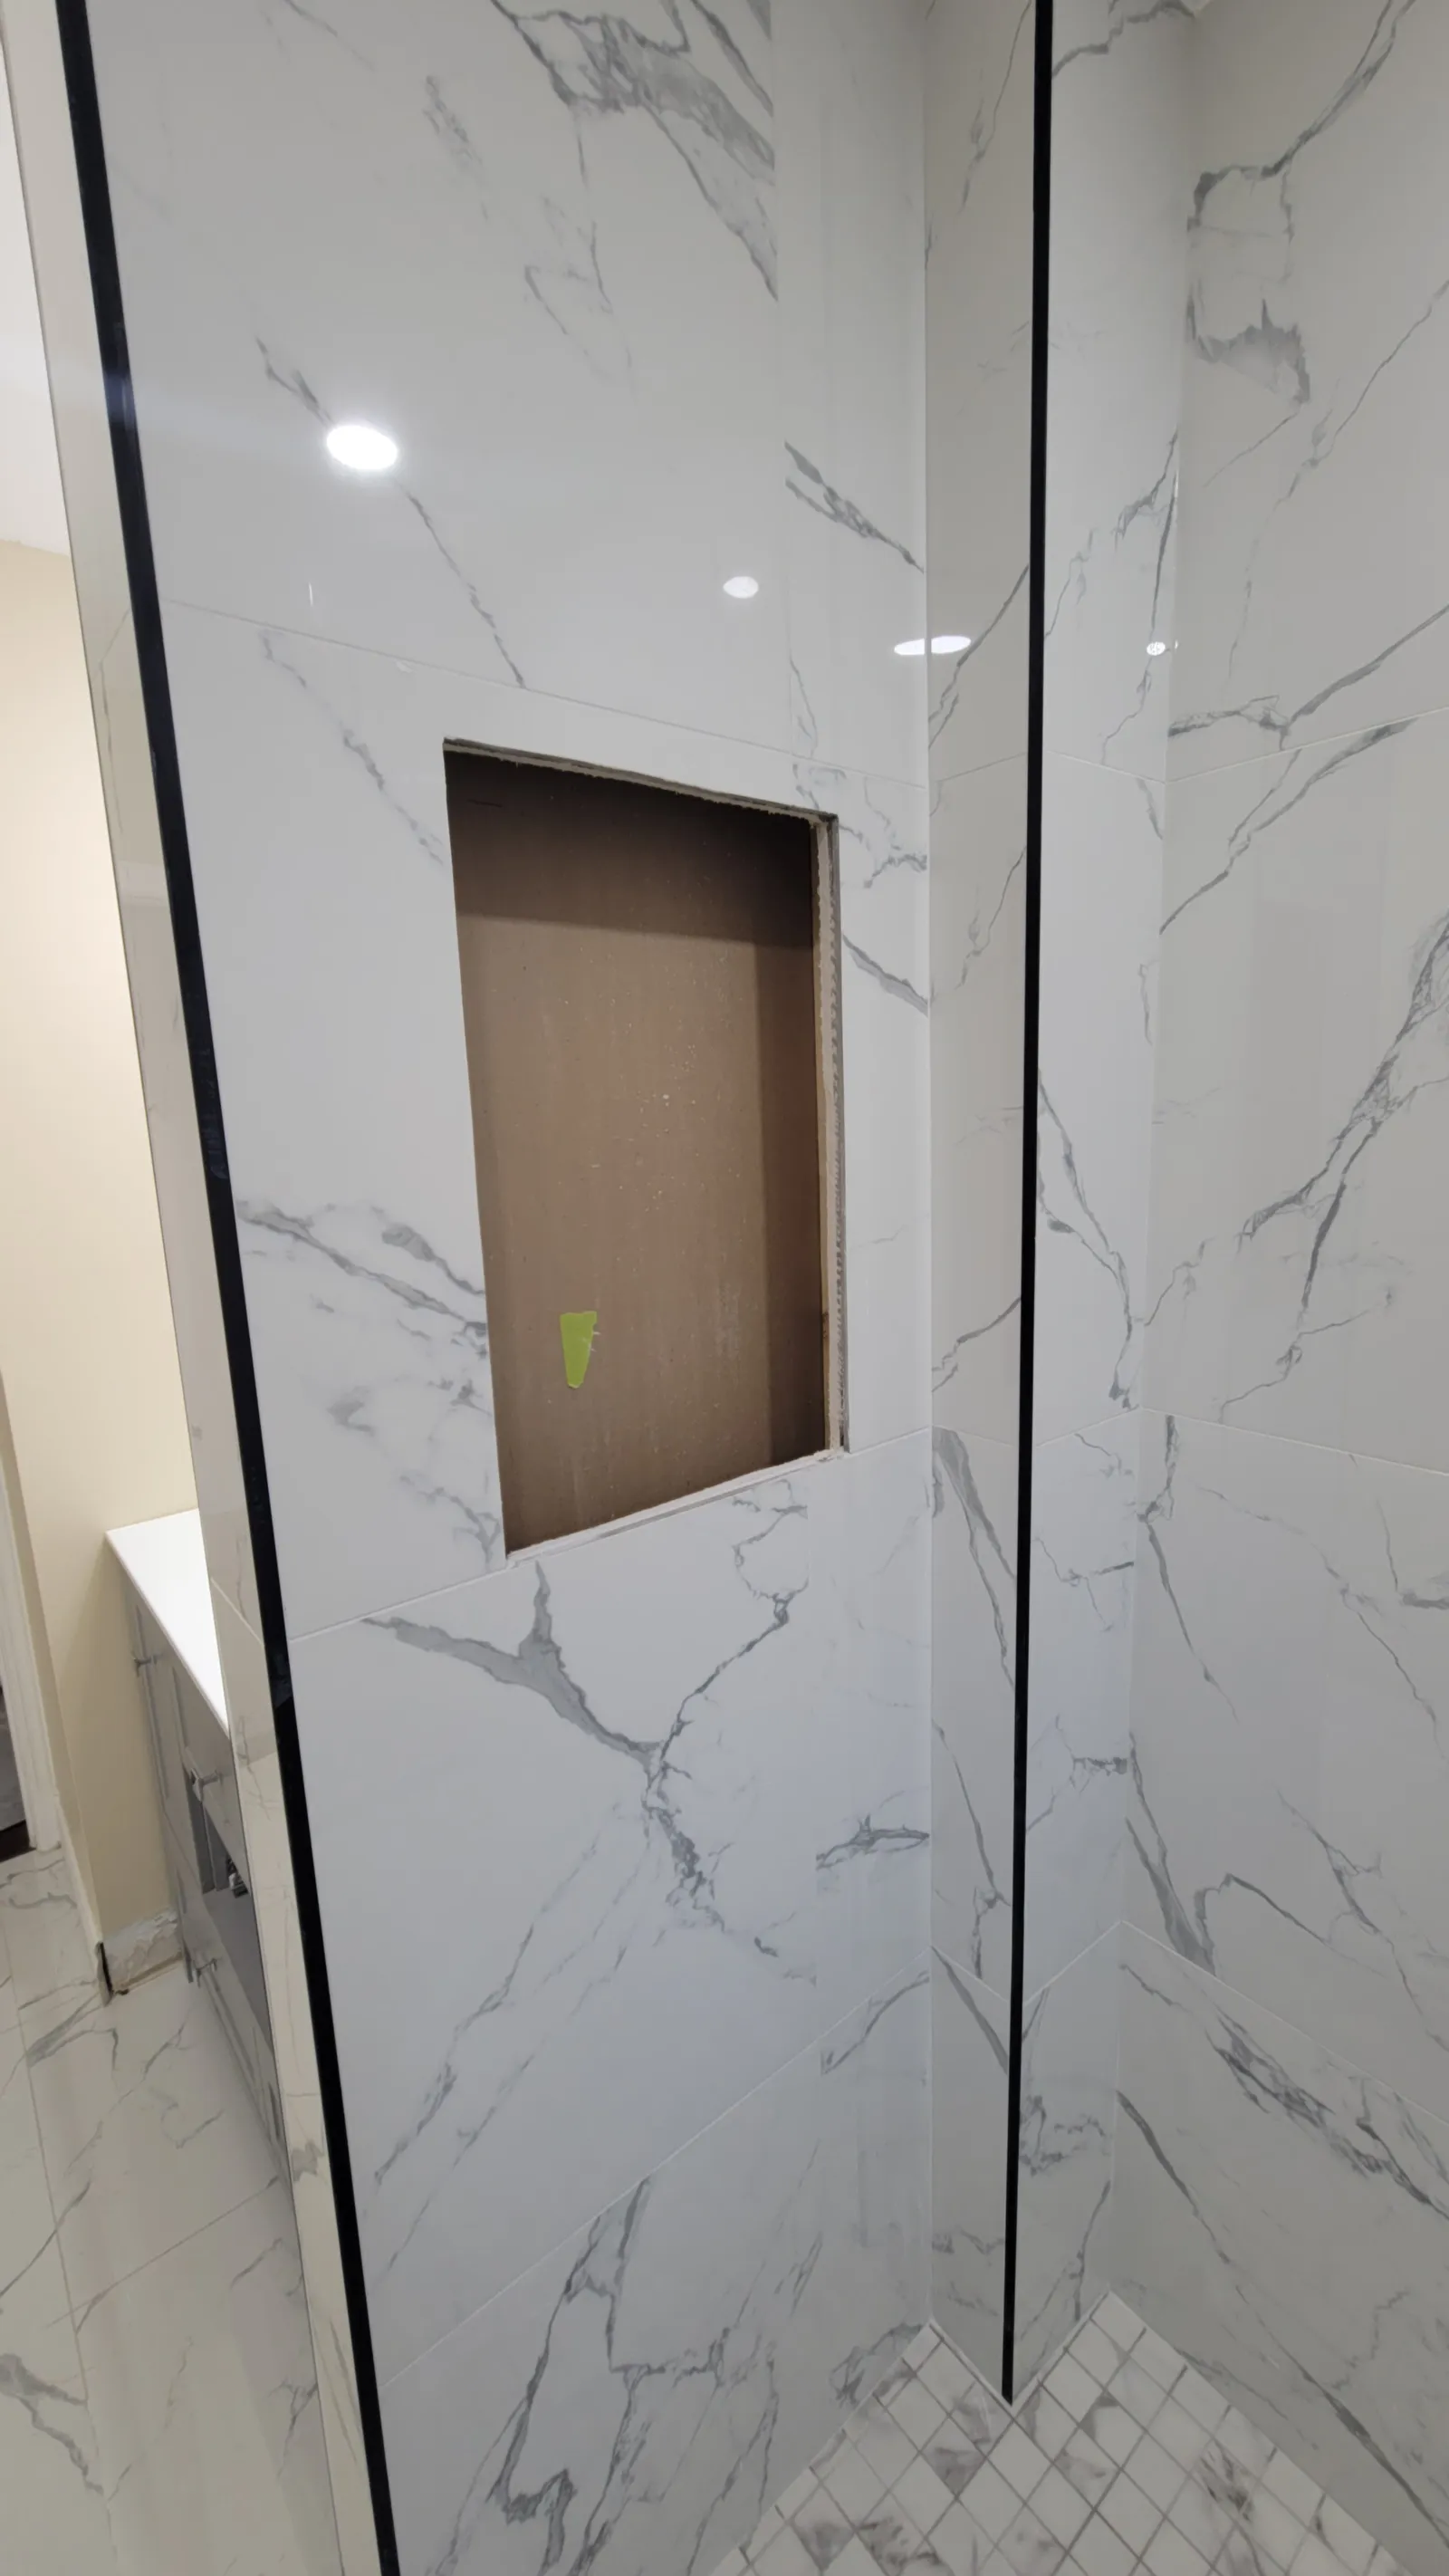
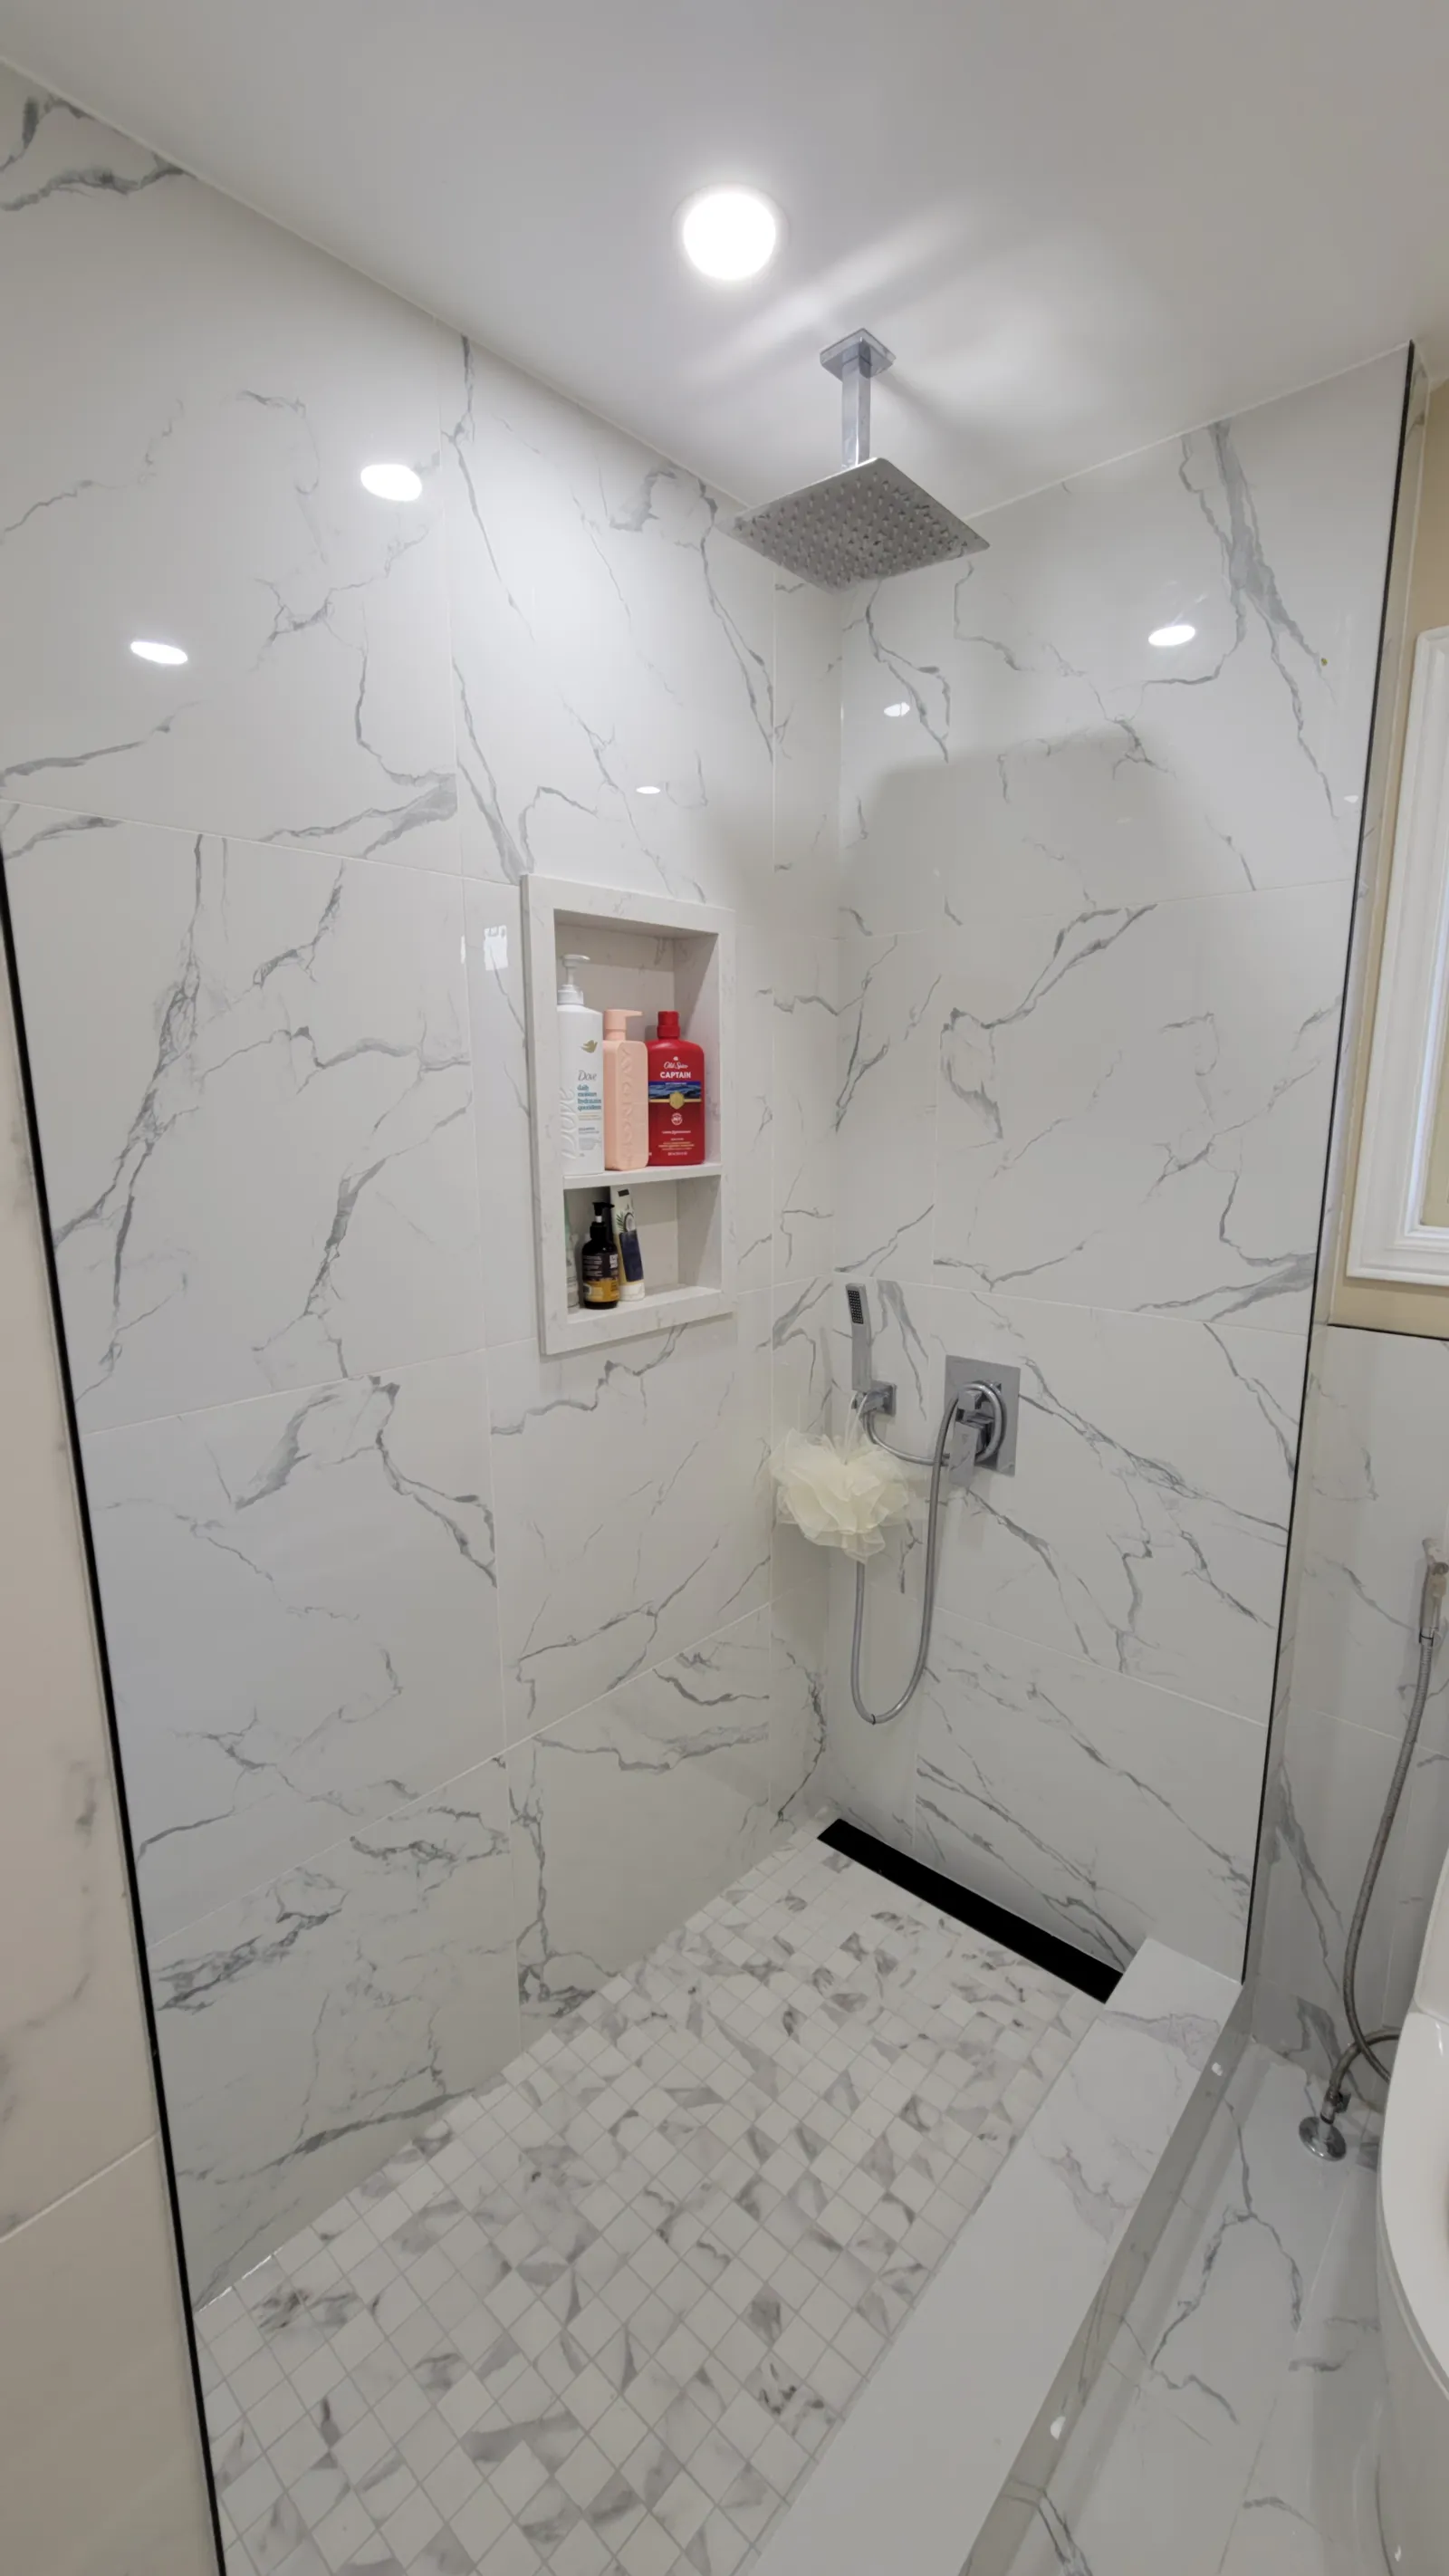
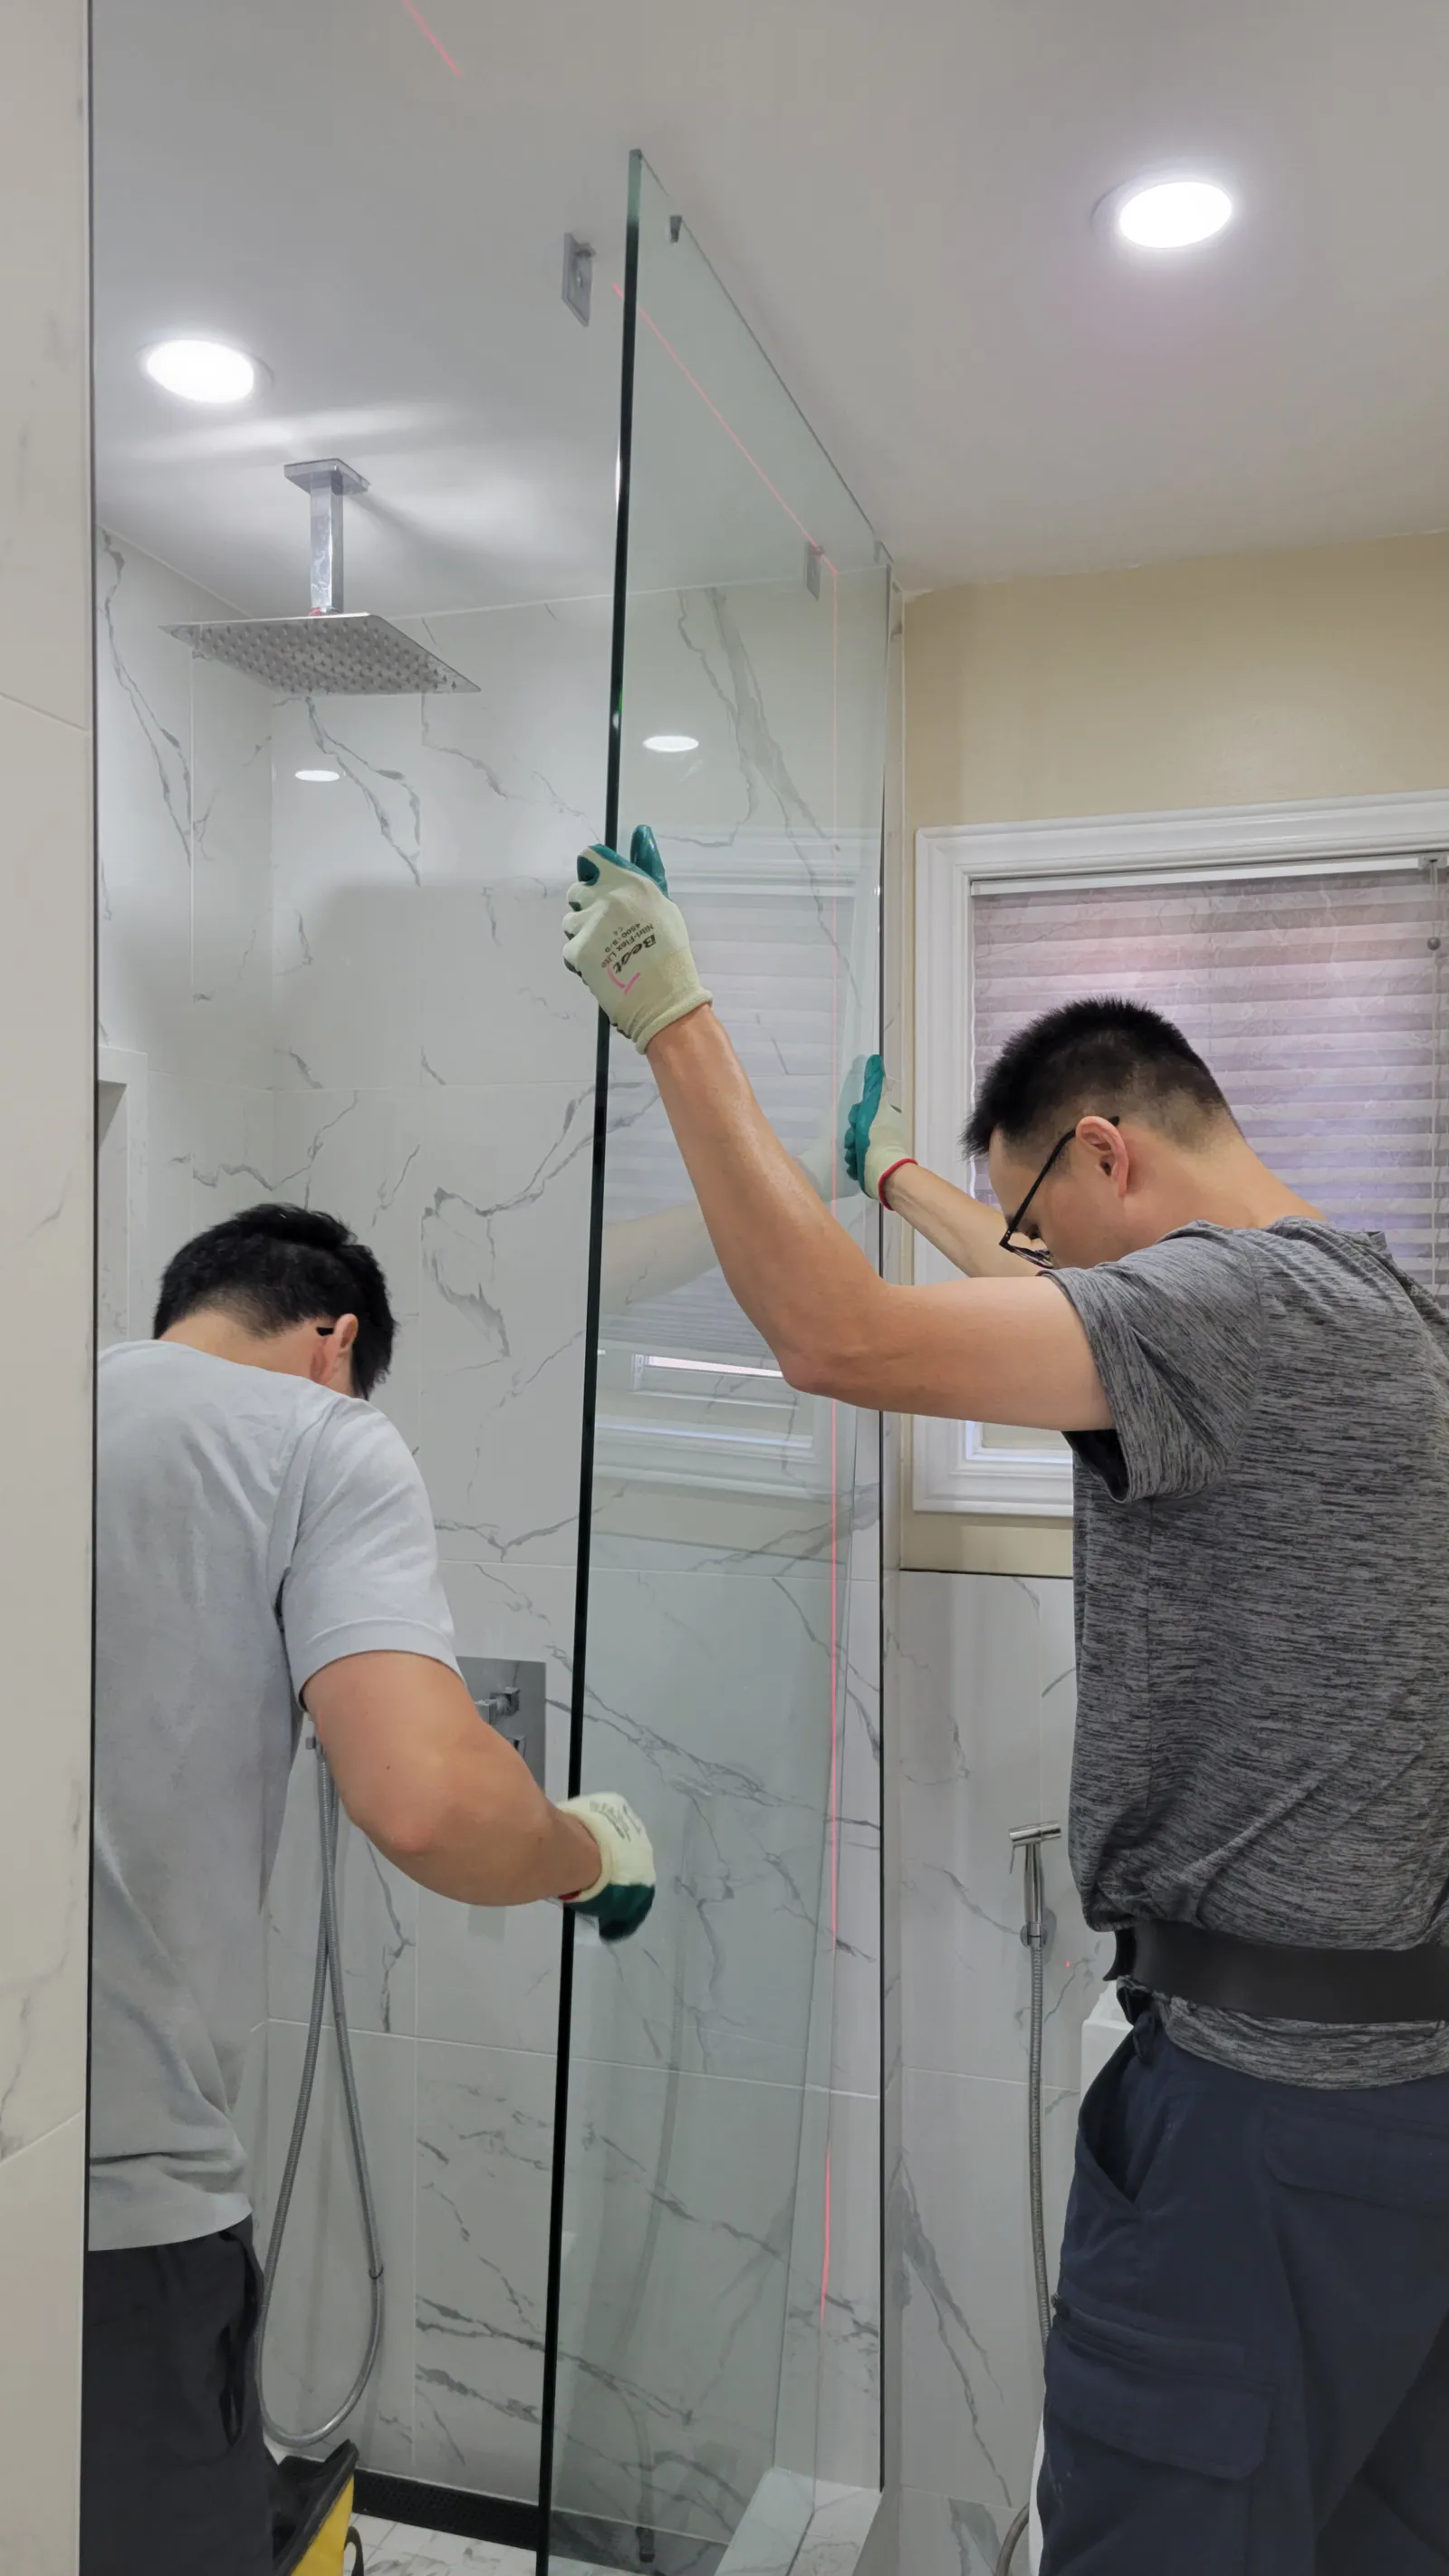
From the doorway it looks like the shower the homeowners thought they were getting the first time. The difference is everything under the tile: a sloped, waterproofed pan, a sealed curb, sound framing and a drain that carries water out instead of letting it soak in.
How to spot a shower that was installed badly
- Grout or caulk that cracks open along the curb or floor joints within the first year.
- Tiles that sound hollow, shift, or visibly separate at the base of the walls.
- Black mould that keeps returning at the same joints no matter how often you clean it.
- Water stains on the ceiling below the bathroom, or a musty smell that never leaves.
- A floor that puddles instead of draining — the slope was never formed properly.
What a repair like this costs
The honest answer: it depends on how far the water got. Catching a failing shower early can mean a contained floor-and-curb rebuild; leaving it for a year can add joists, subfloor and the ceiling below. As a rough guide for the York Region market:
- Shower floor and curb tear-out and proper rebuild: $4,500–$8,500
- With subfloor or framing repairs from water damage: $6,500–$12,000
- Full shower rebuild including walls, new plumbing and glass: $9,000–$16,000
Every leak is different, so every repair starts with a free site visit and ends with a fixed quote — and an honest assessment of how much of the existing shower is worth keeping.
Why hire a professional — the second time matters most
- A shower fails from the inside out. The slope, liner and waterproofing are invisible on day one and decisive by year two.
- A leak repair is only as good as the investigation — if nobody opens the subfloor, nobody knows the damage is fixed.
- Cheap installs are the most expensive kind: this homeowner paid for the same shower twice.
- Your workmanship is guaranteed, and we photograph the stages you will never see again so you know what is behind your tile.
Shower leak repairs across York Region
We diagnose and rebuild leaking showers for homeowners across Newmarket, Aurora, Richmond Hill, Vaughan, Markham, East Gwillimbury, Bradford and the wider York Region through our bathroom renovation service. Keeping a healthy shower sealed is much cheaper — that is a caulking visit. And if you are planning a new shower and want it built right the first time, see our walk-in shower renovation in Vaughan.
Seeing cracked grout, loose tiles or mould that keeps coming back? Request a free estimate before the water gets any further.
"The parts of a shower that keep water in are the parts you never see. That is where the money should go — the first time."
Need a hand with a project?
Book the VOL Handyman team for the work in this article — or anything else around your home or business.